

Installing Oracle Enterprise Linux 6.7 on Physical Standalone Server (Customized Storage Design).
Being an Oracle DBA, we all must have had to install Linux in our machines to work with the Database. However most of the time we do install it in a Virtual Machine which would have been a completely different approach when coming to install it on Physical Server. And especially when it is for dedicated Database server. Here we’ll see how to install OEL on physical standalone server with fully customized storage design.
For the installation of Oracle Enterprise Linux on a physical server we must have media DVD or media Pen-drive, which will contain OS media. This device should be bootable.
1. boot it from the bootable media.
We’ll have to enter into the boot menu of the machine and need to select bootable device to boot the OS. and select Install or Upgrade an existing system.

2. Then we’ll have to select language of the installation.

3. Then we’ll have to select keyboard type.

4. In this screen we’ll get the list of the media from which we’ll have to select a media containing our OS source. In this demonstration we have it in a Pen-drive so we’re selecting Hard Drive here.

5. Here we’ll have to select the partition which hold the OS setup, in our case it’s in the first partition of pen-drive hence we’ll select /dev/sda1 where sda is pendrive and 1 indicates
first partition.

6. Oracle Linux 6 is successfully booted now, click NEXT.

7. Select Basic Storage Devices as we’re not connecting any network storage, and click NEXT.

8. Select Fresh Installation and click NEXT.

9. Enter the hostname of the server and then click on Configure Network button on the left bottom as shown in the below screenshot.

10. Select system eth0 and click on edit.

11. Make sure. Connect automatically and Available to all users check boxes are checked. and in IPv4 setting select Dynamic from drop down and click Apply button on the window.

And then Click NEXT.

12. You can select timezone form the drop down list and from World map as well, click on your nearest timezone on map to select timezone, as we’ve selected Kolkata, Asia and then Click NEXT.

13. Enter strong root password, reenter in confirm field and click NEXT.

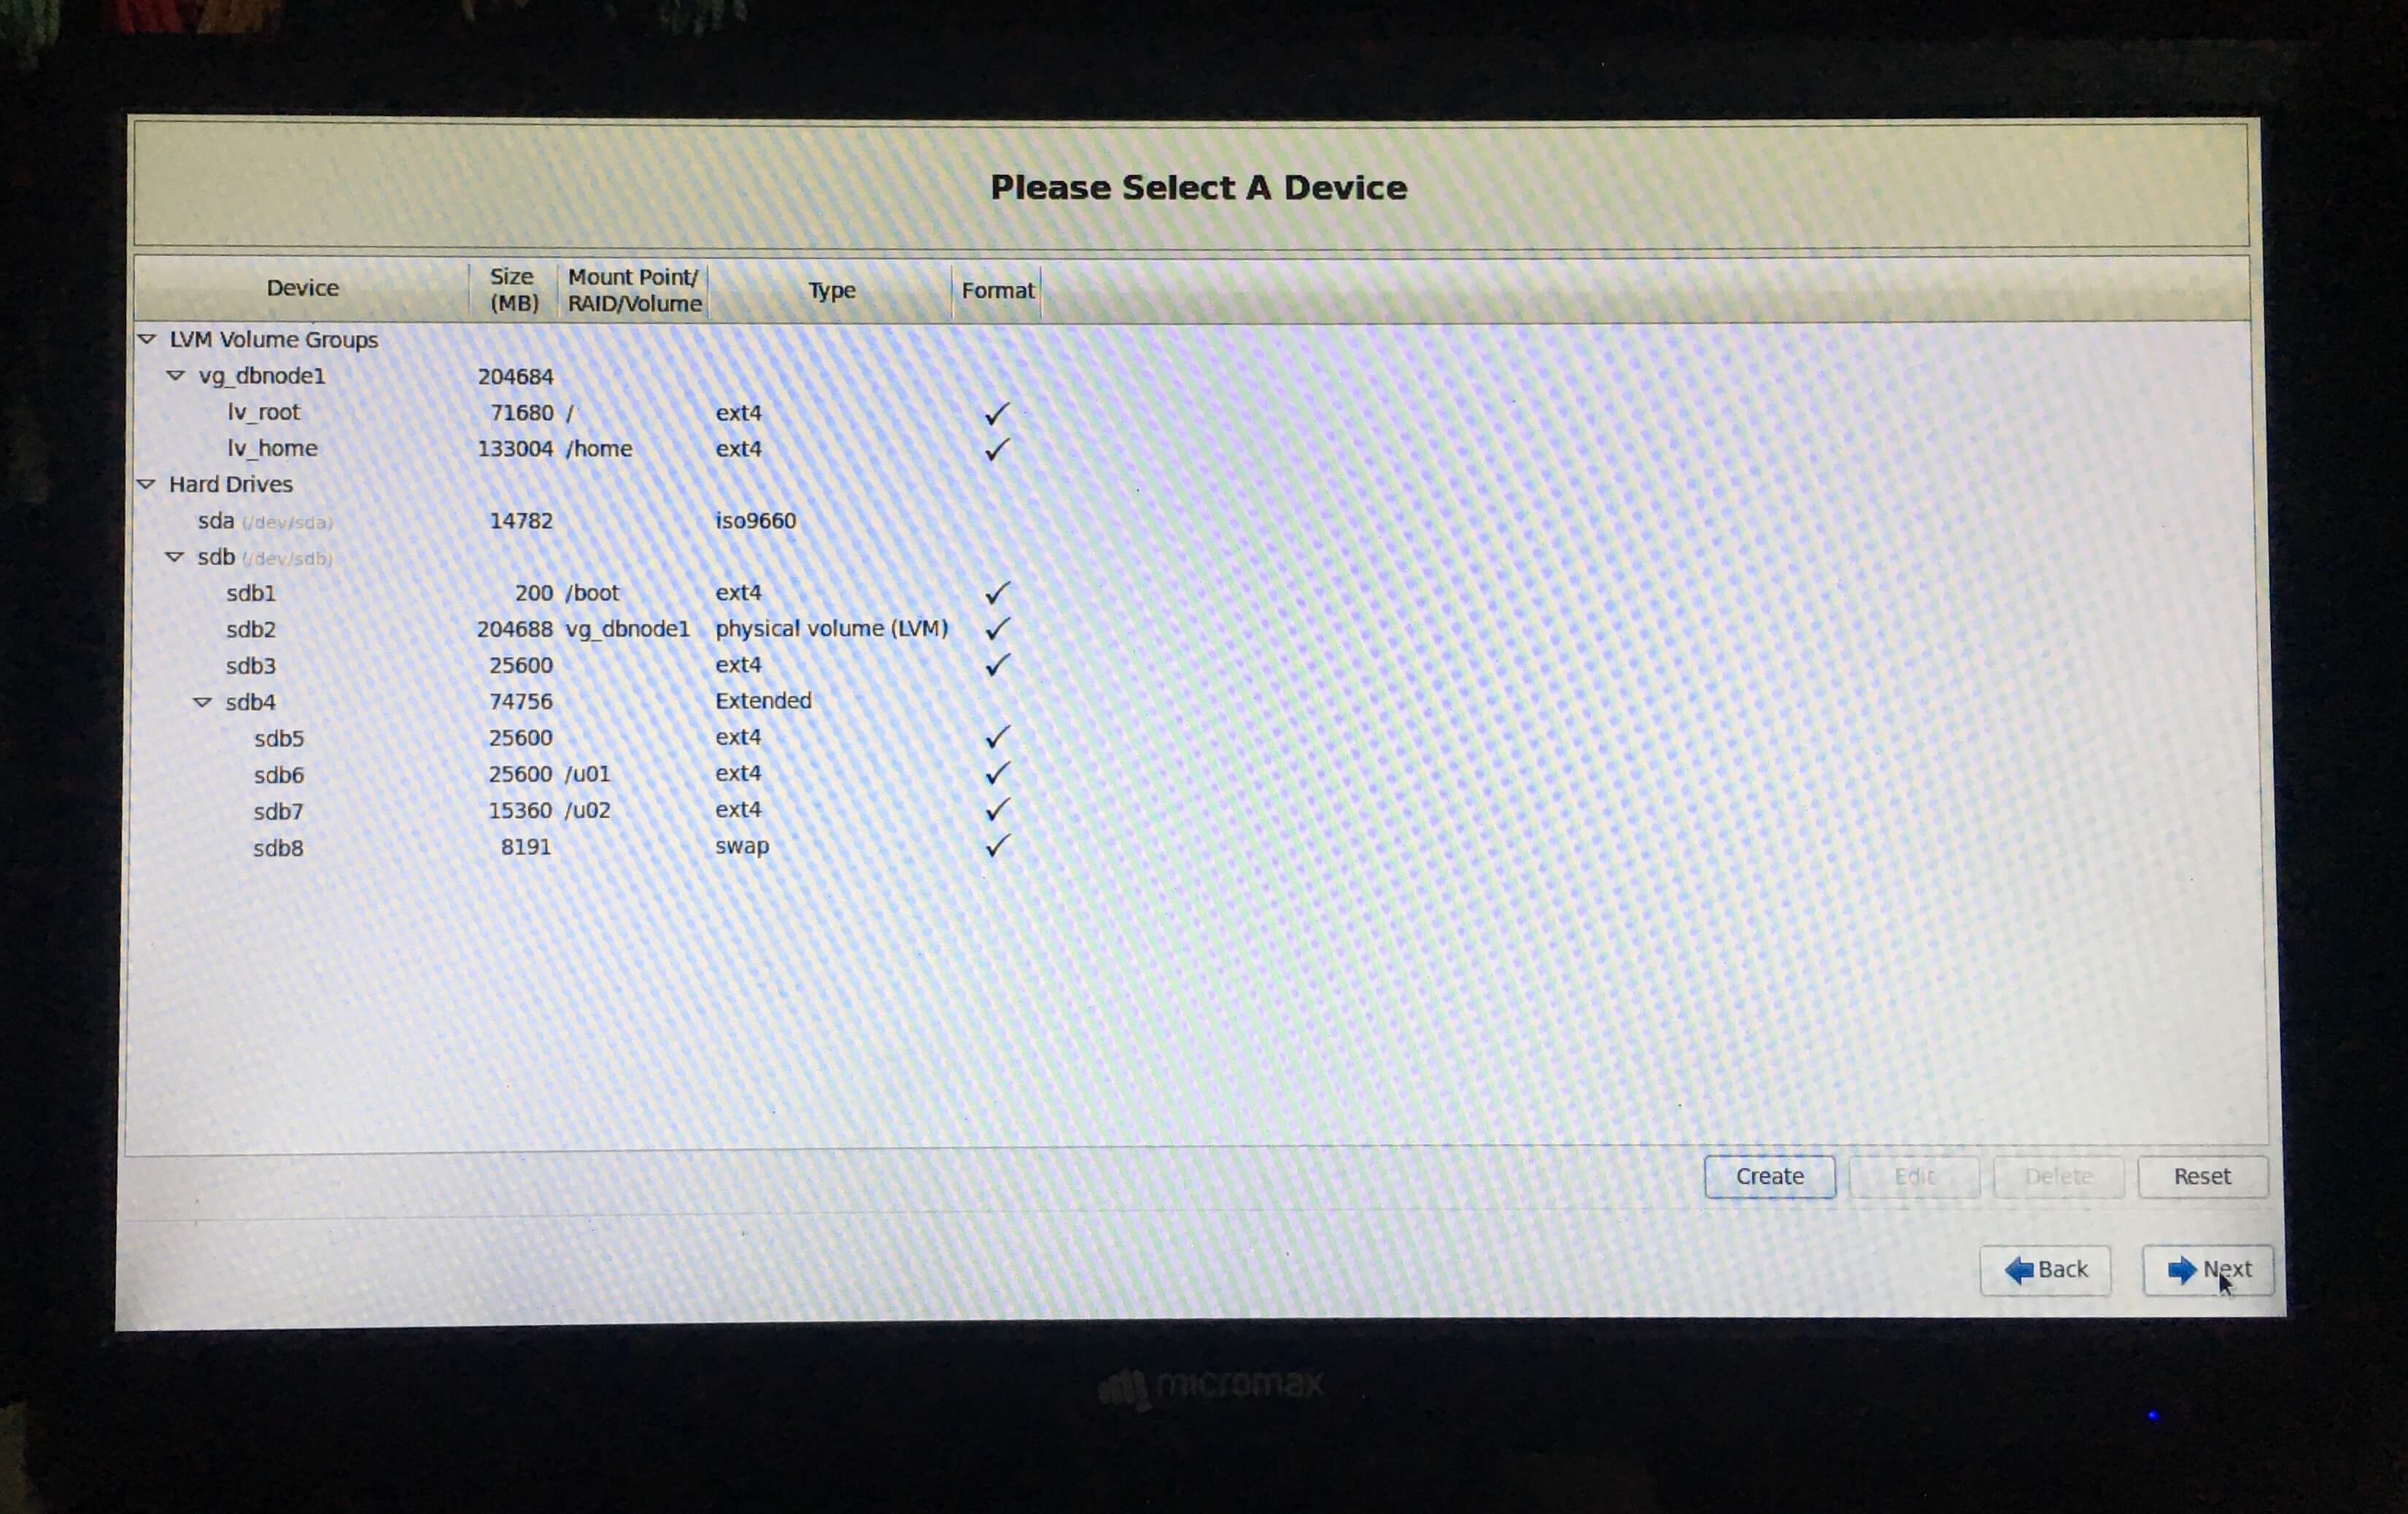
14. This is the screen where we’ll going to create customized storage design for our Database machine. select Create Custom Layout and click NEXT.

Now be cautious while customizing these layouts. In this wizard we’ll create,
- /boot partition (which will store the boot files of OS).
- /u01 for our Database Binaries.
- /u02 for Grid Infrastructure Binaries.
- Two raw partitions to create ASM Disks, which we’ll not mount.
- Swap partition.
- Then we’ll create one LVM Physical Volume.
- In above created LVM Physical Volume we’ll create LVM Volume Group.
- Under above LVM Volum Group we’ll create two partitions from which one we’ll mount at root directory of the OS i.e. “/” and the other we will mount at /home directory which will be the home of all users. lengthy task? Yes, and critical too. so be cautious and follow screenshots carefully and it will be fun.
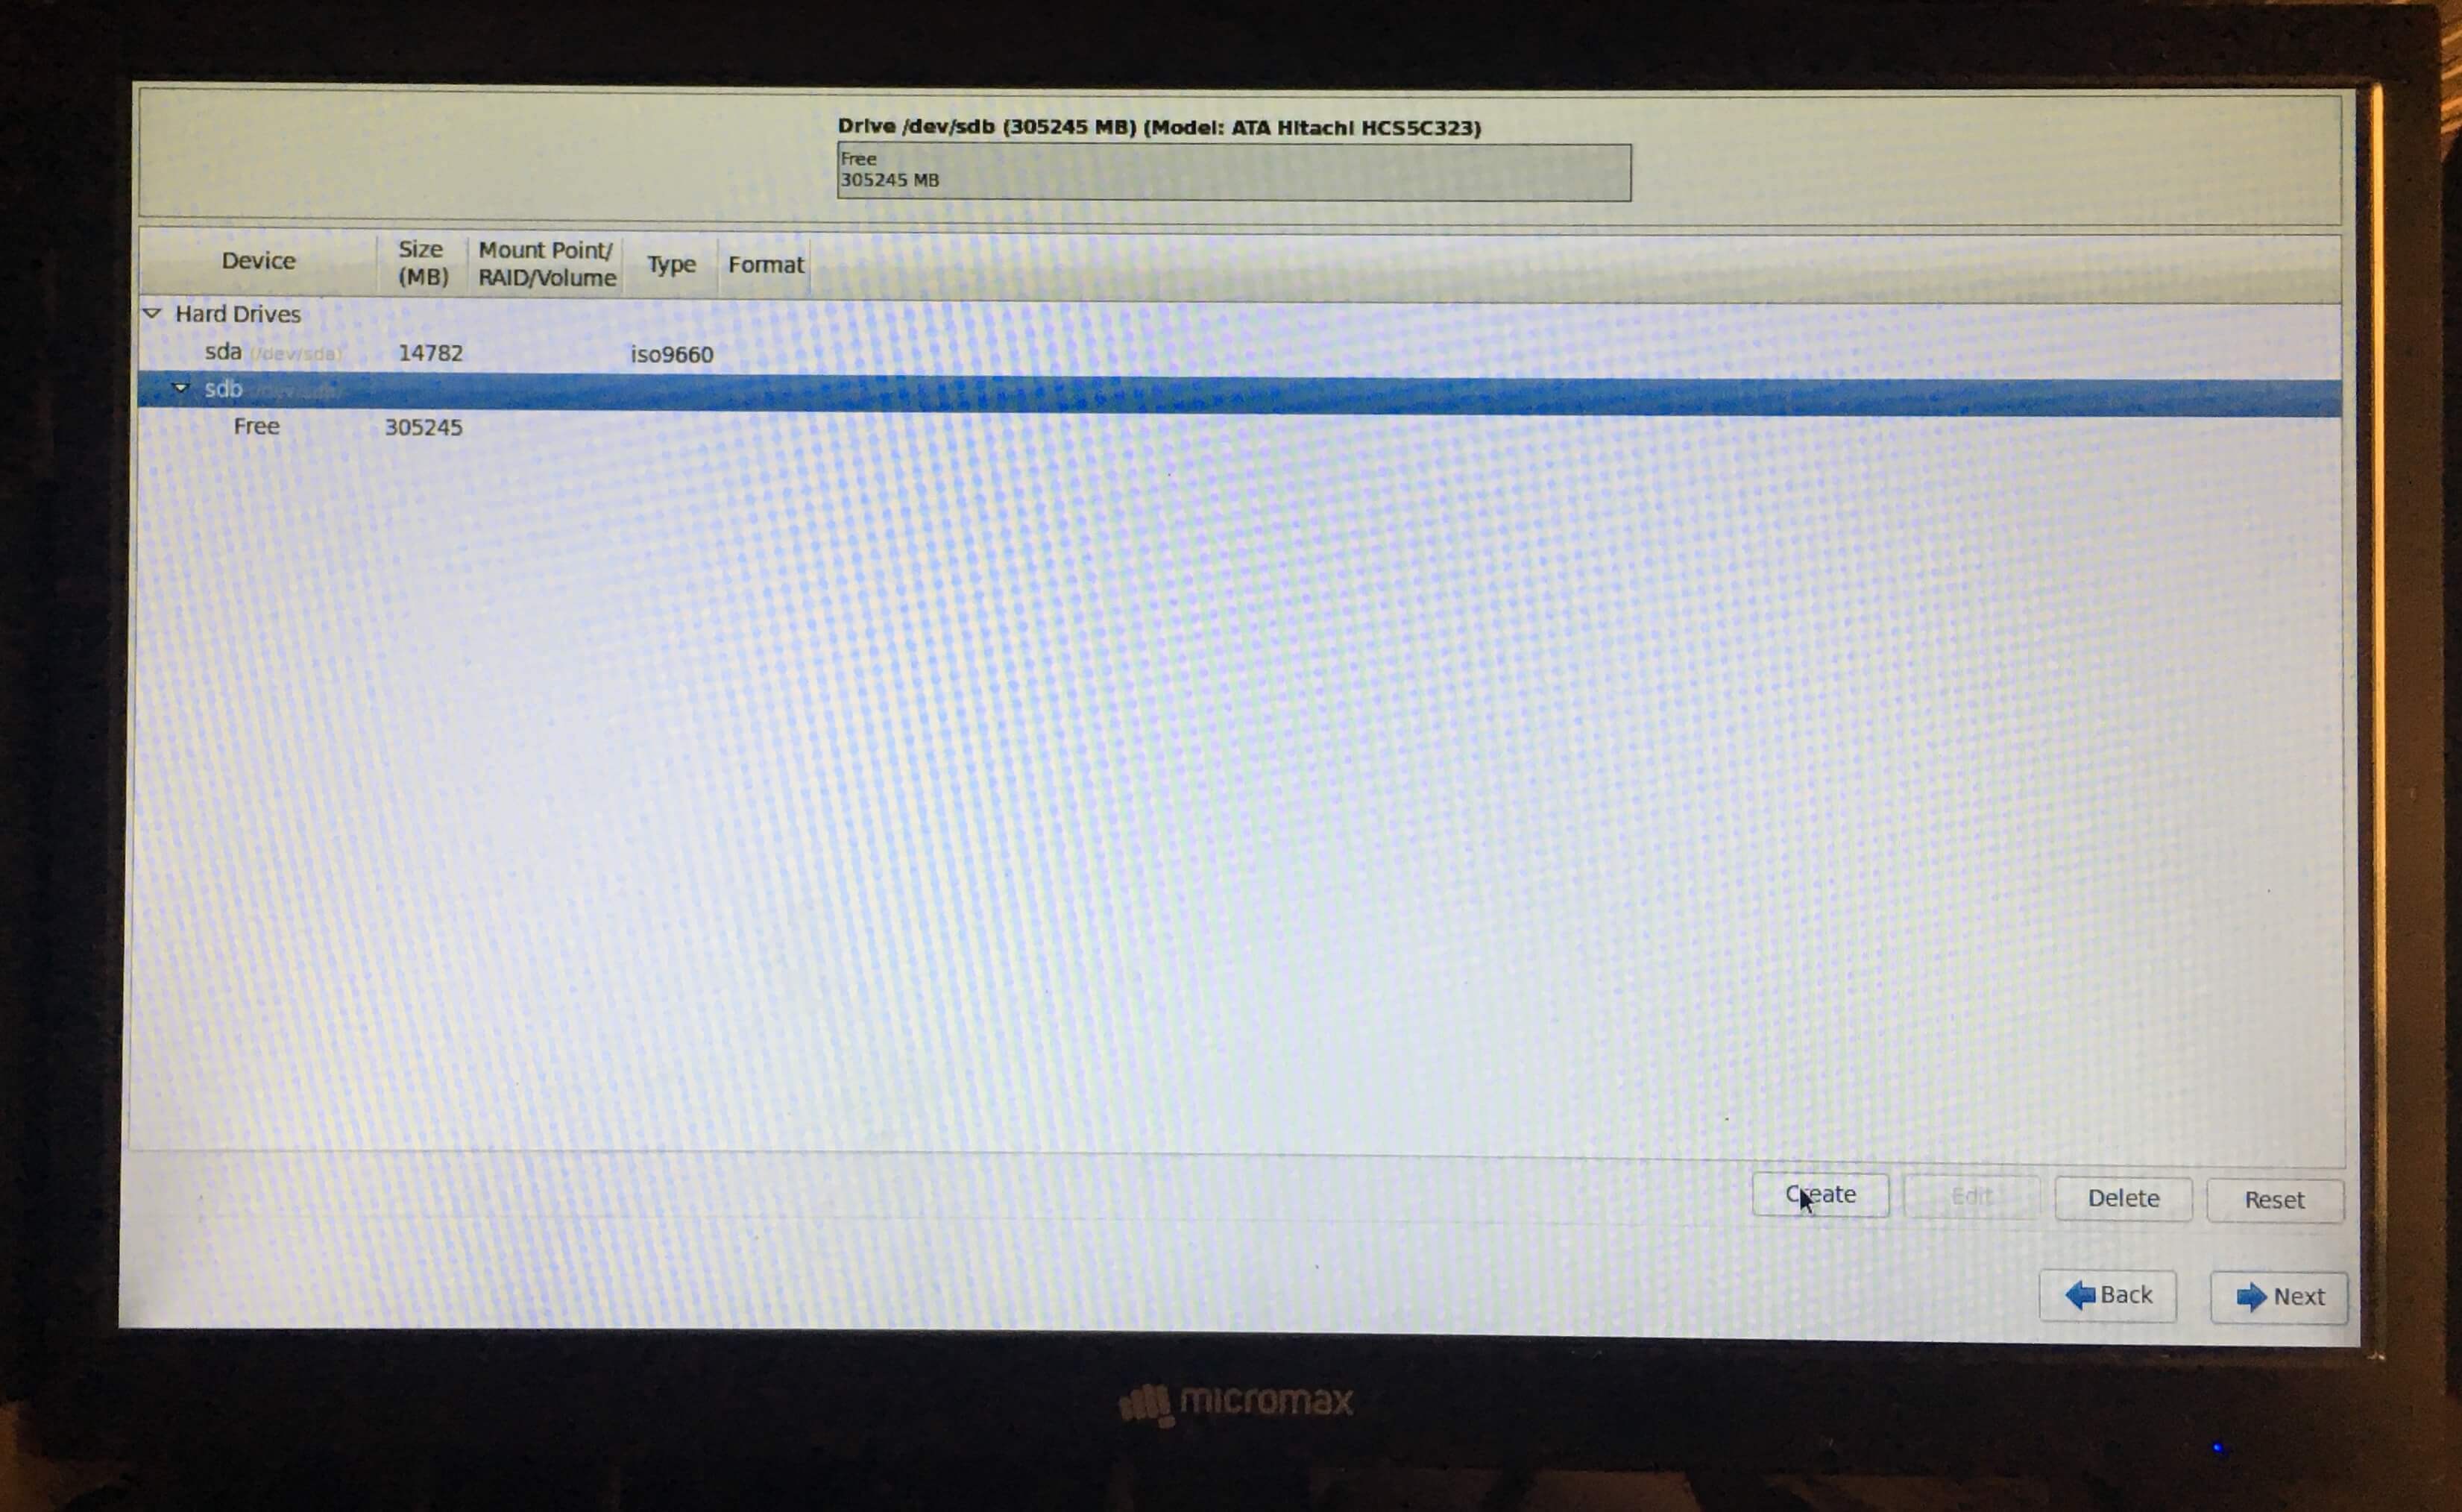
To begin with customizing layouts, you must have fully empty device with no partitions, if you find any partition select that partition and click on delete. you should have empty device with label free(size in MB).
- Now we have free device, hight light it and click on create.
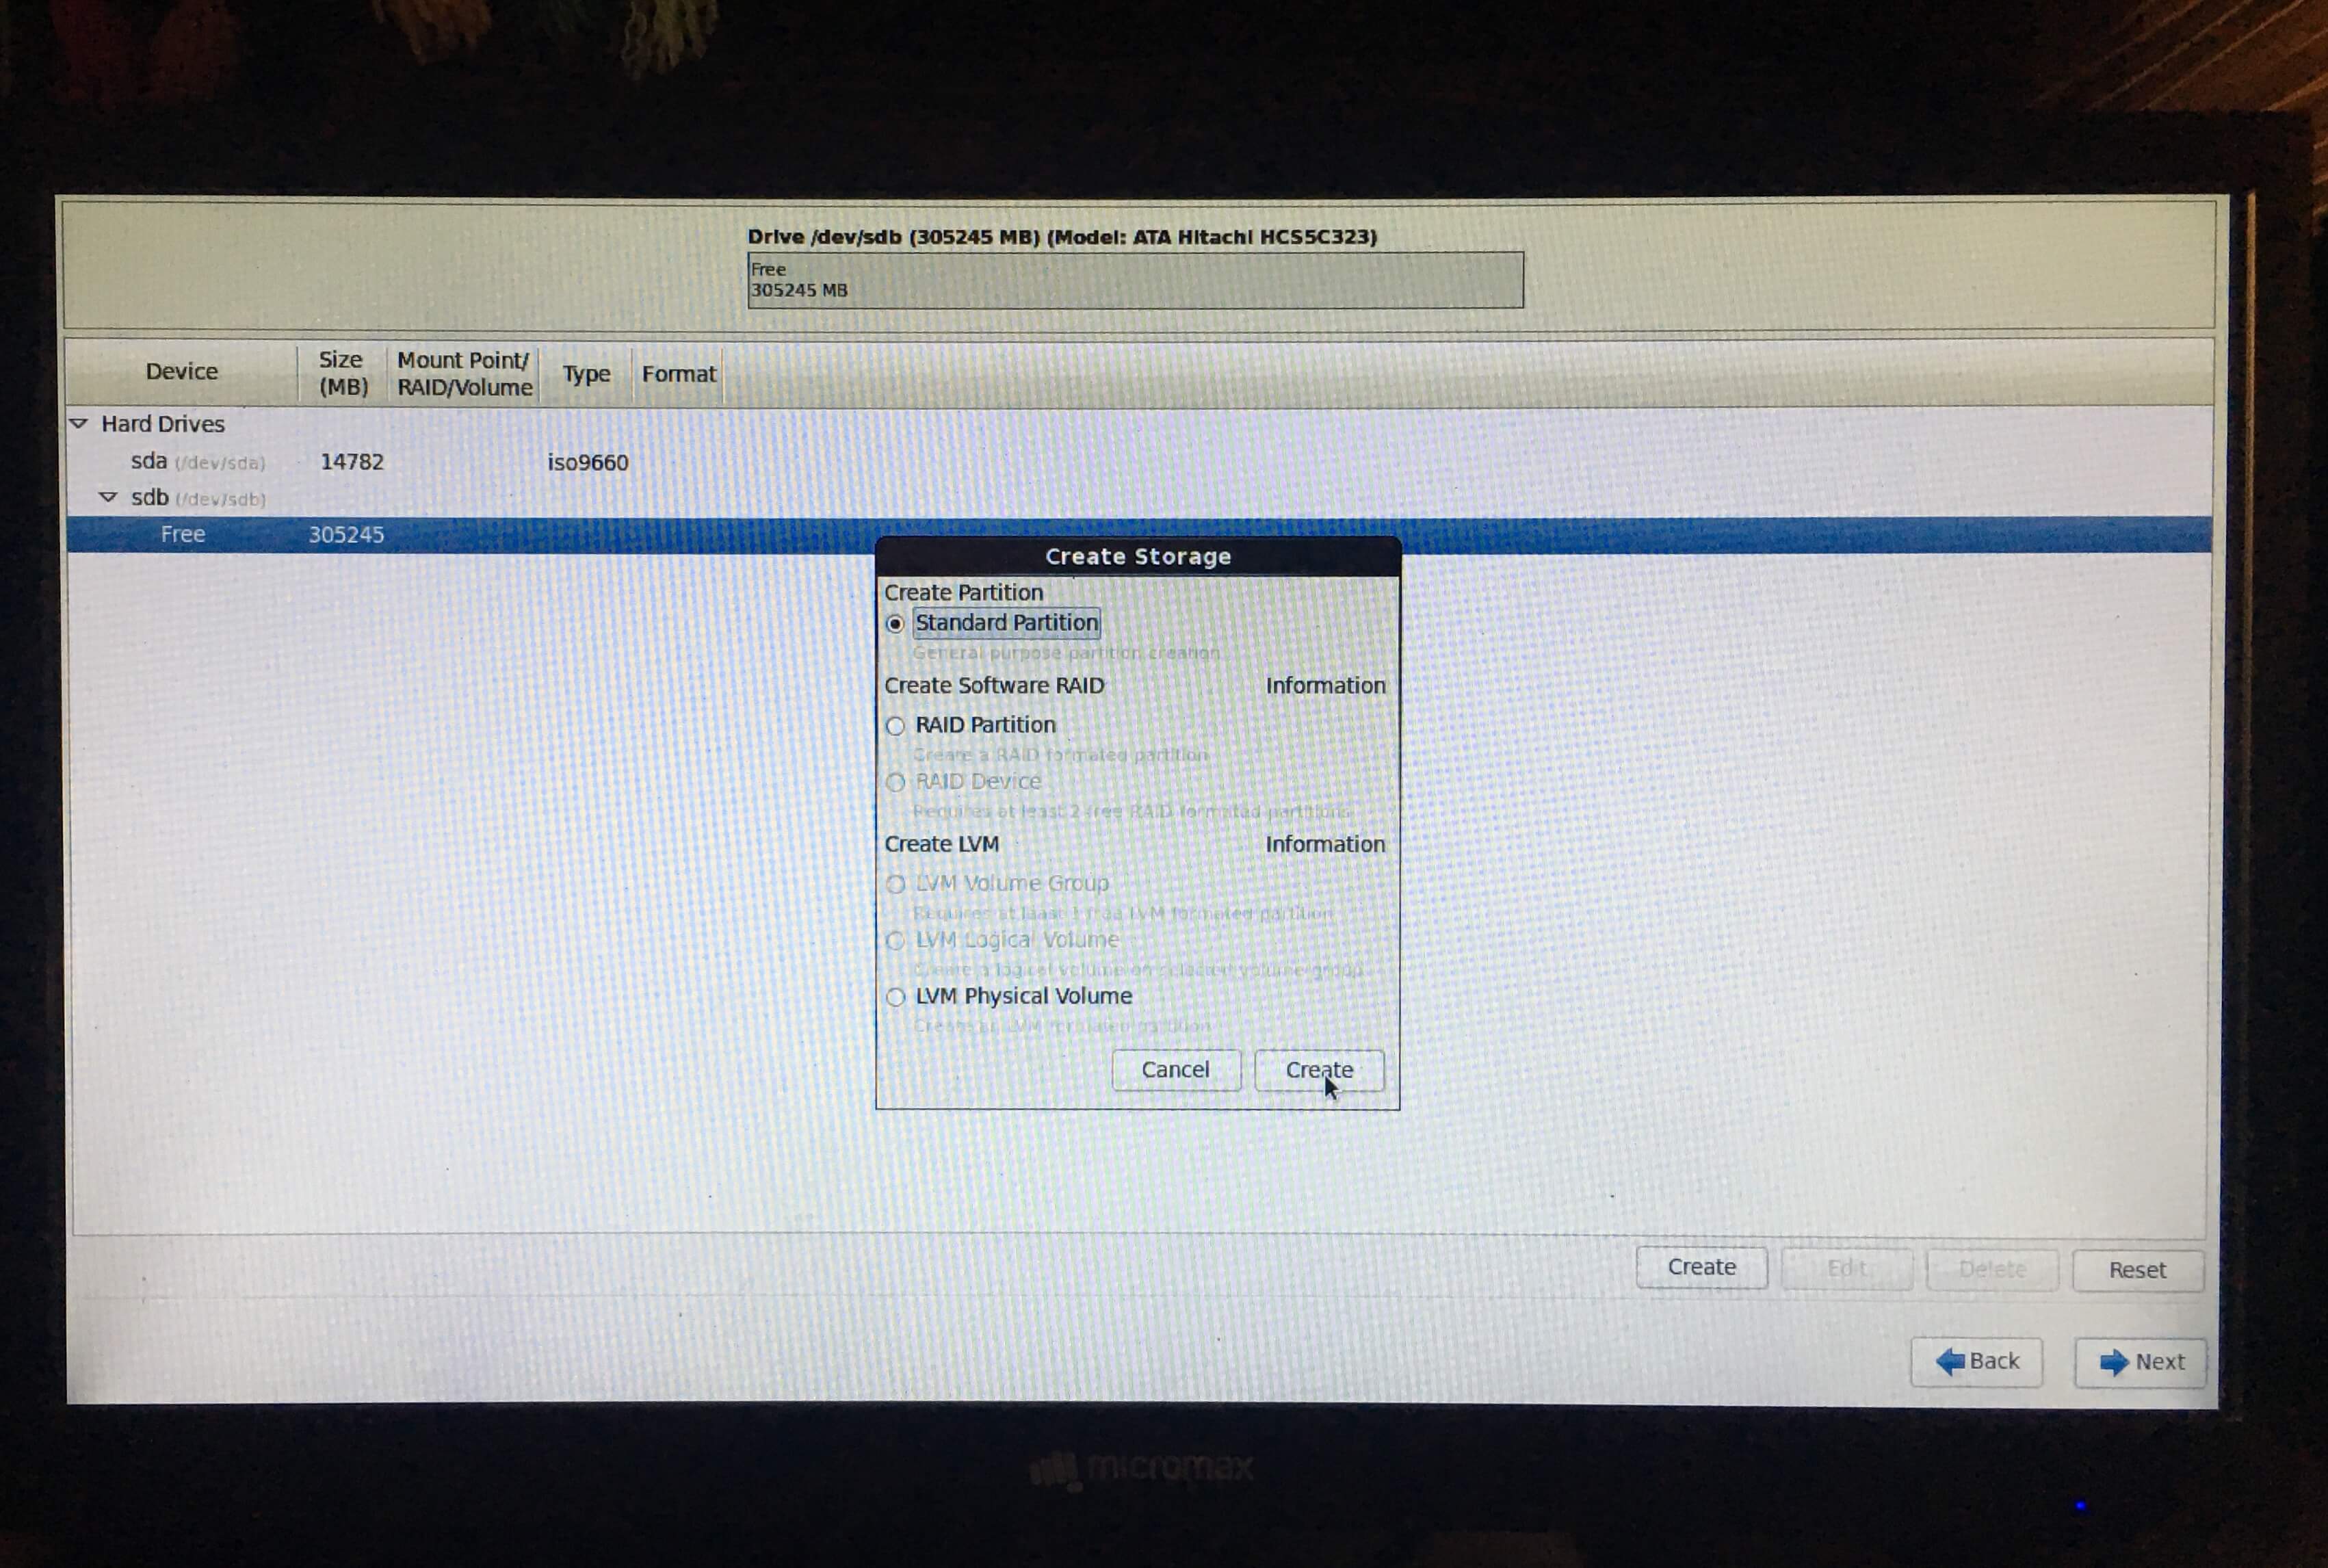
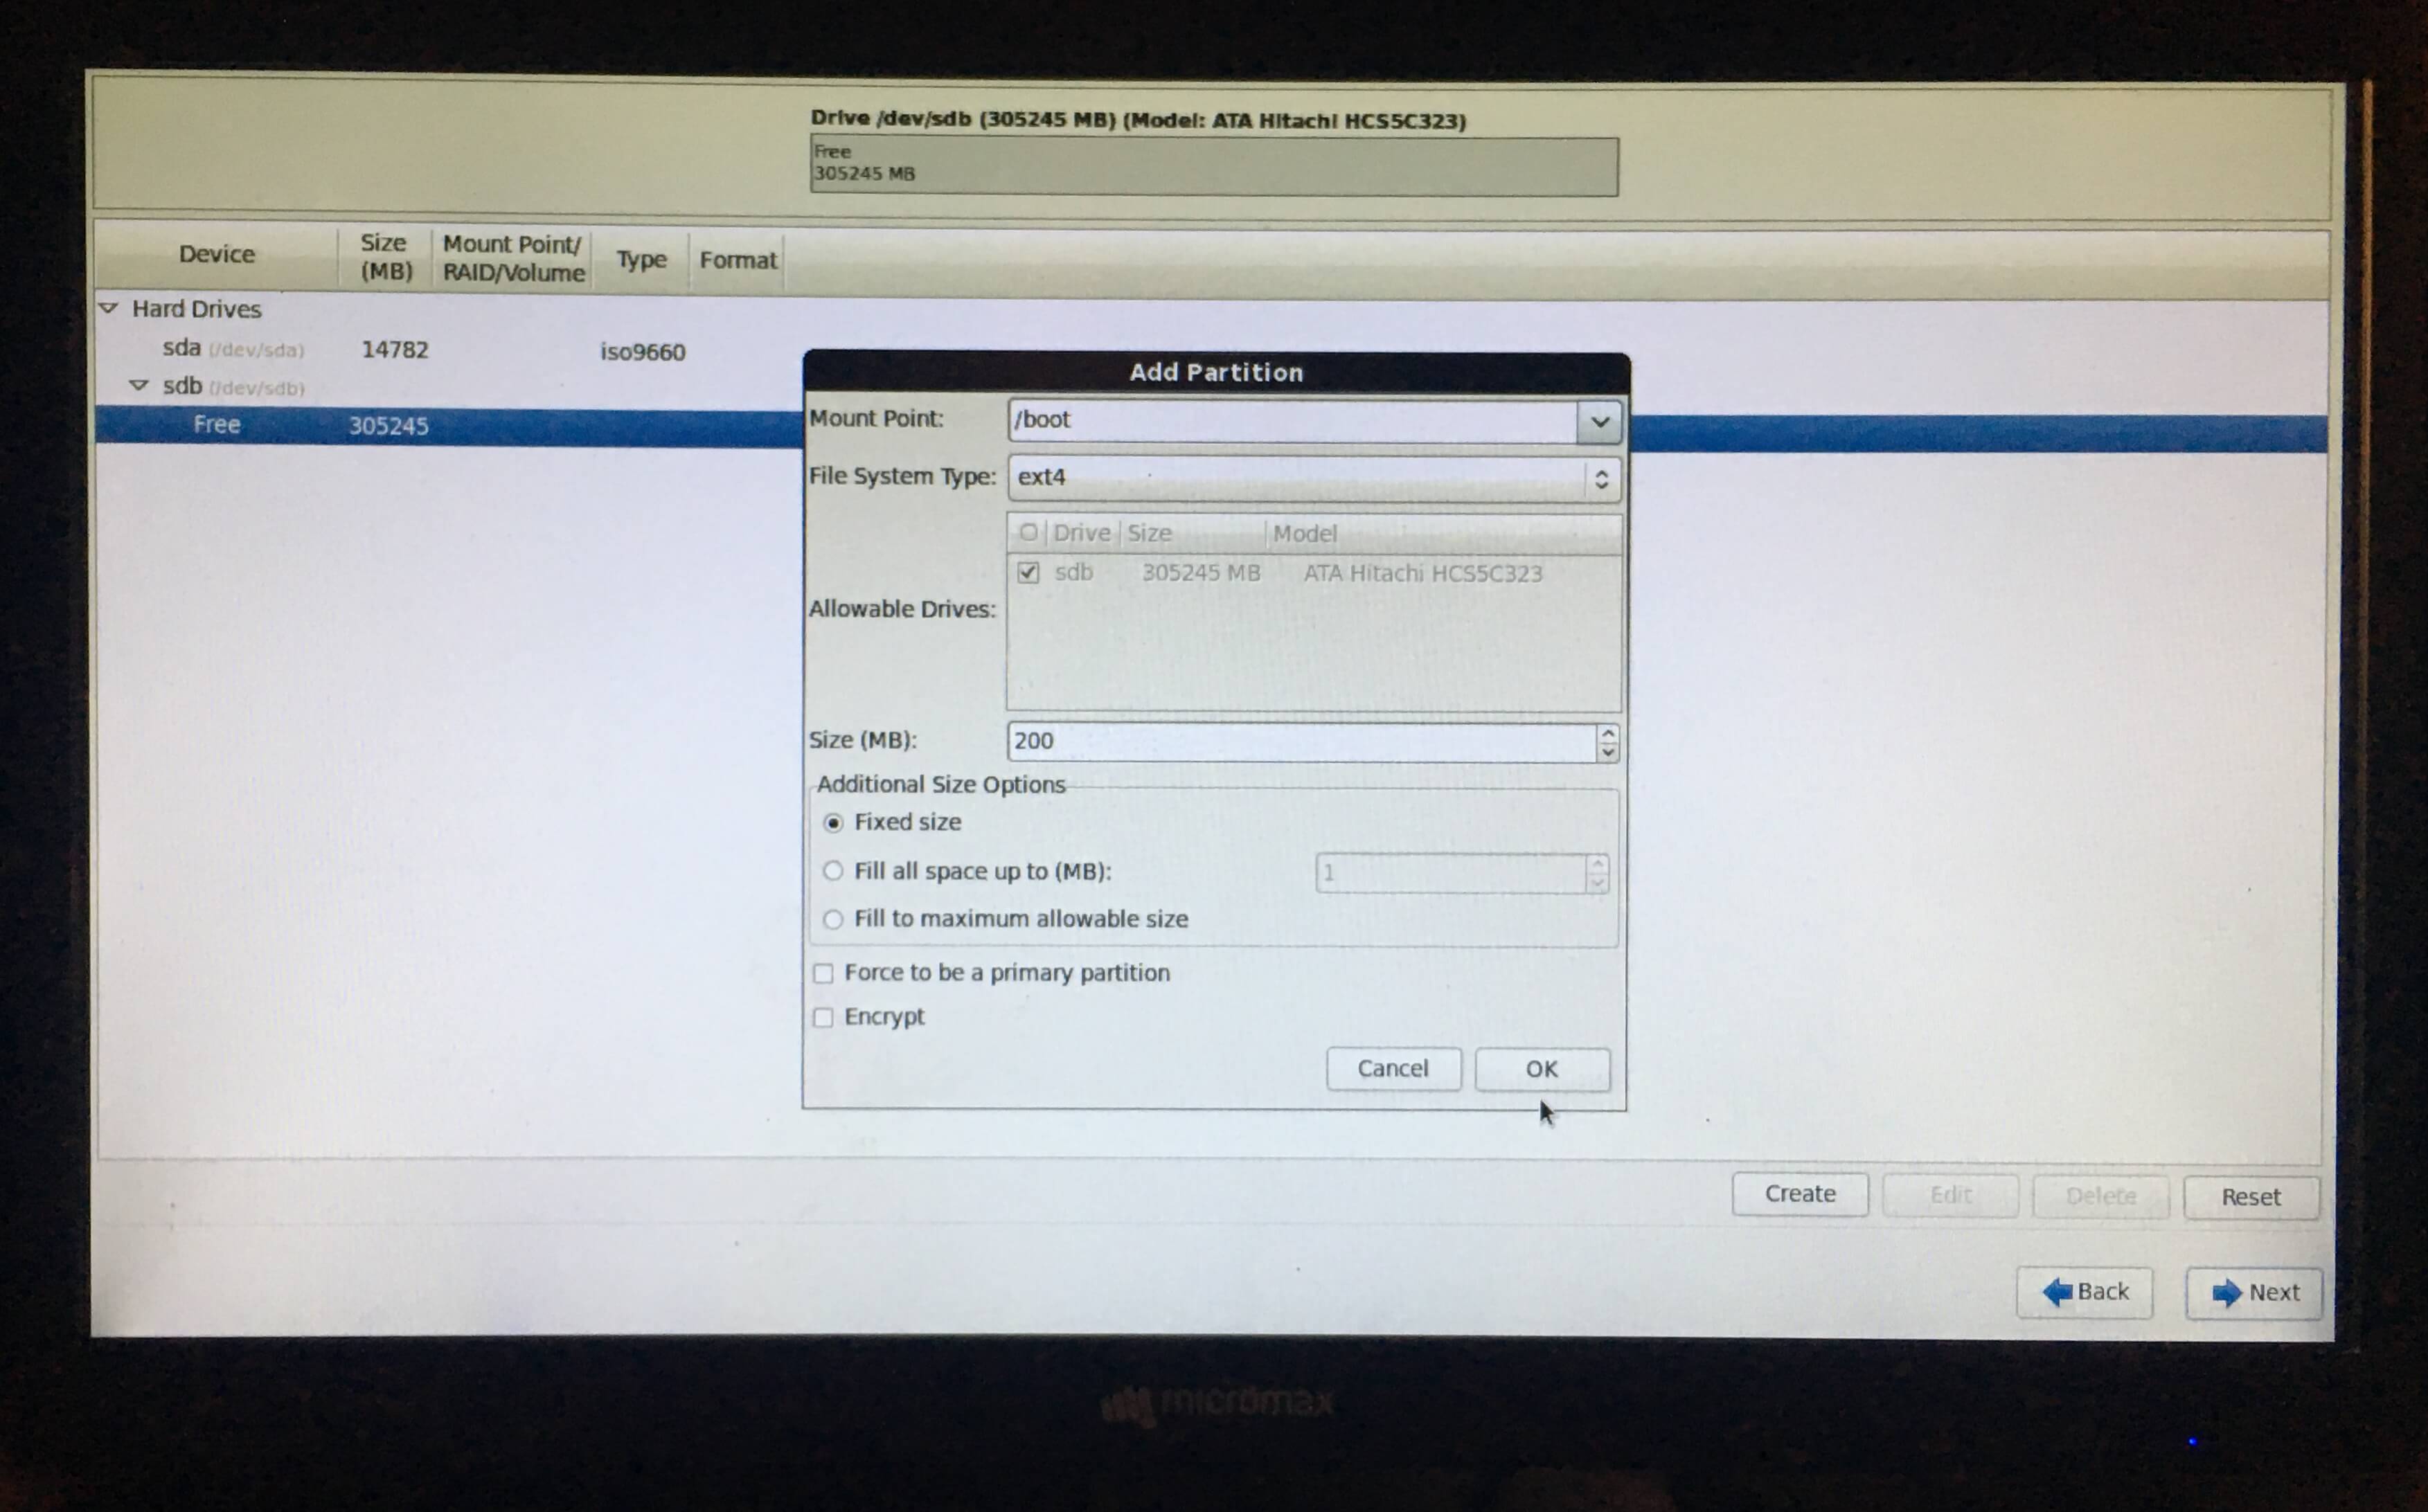
- Select standard partition and click on create, then select mountpoint /boot from dropdown, enter size 200 MB and click on OK. file system will be default i.e. ext4
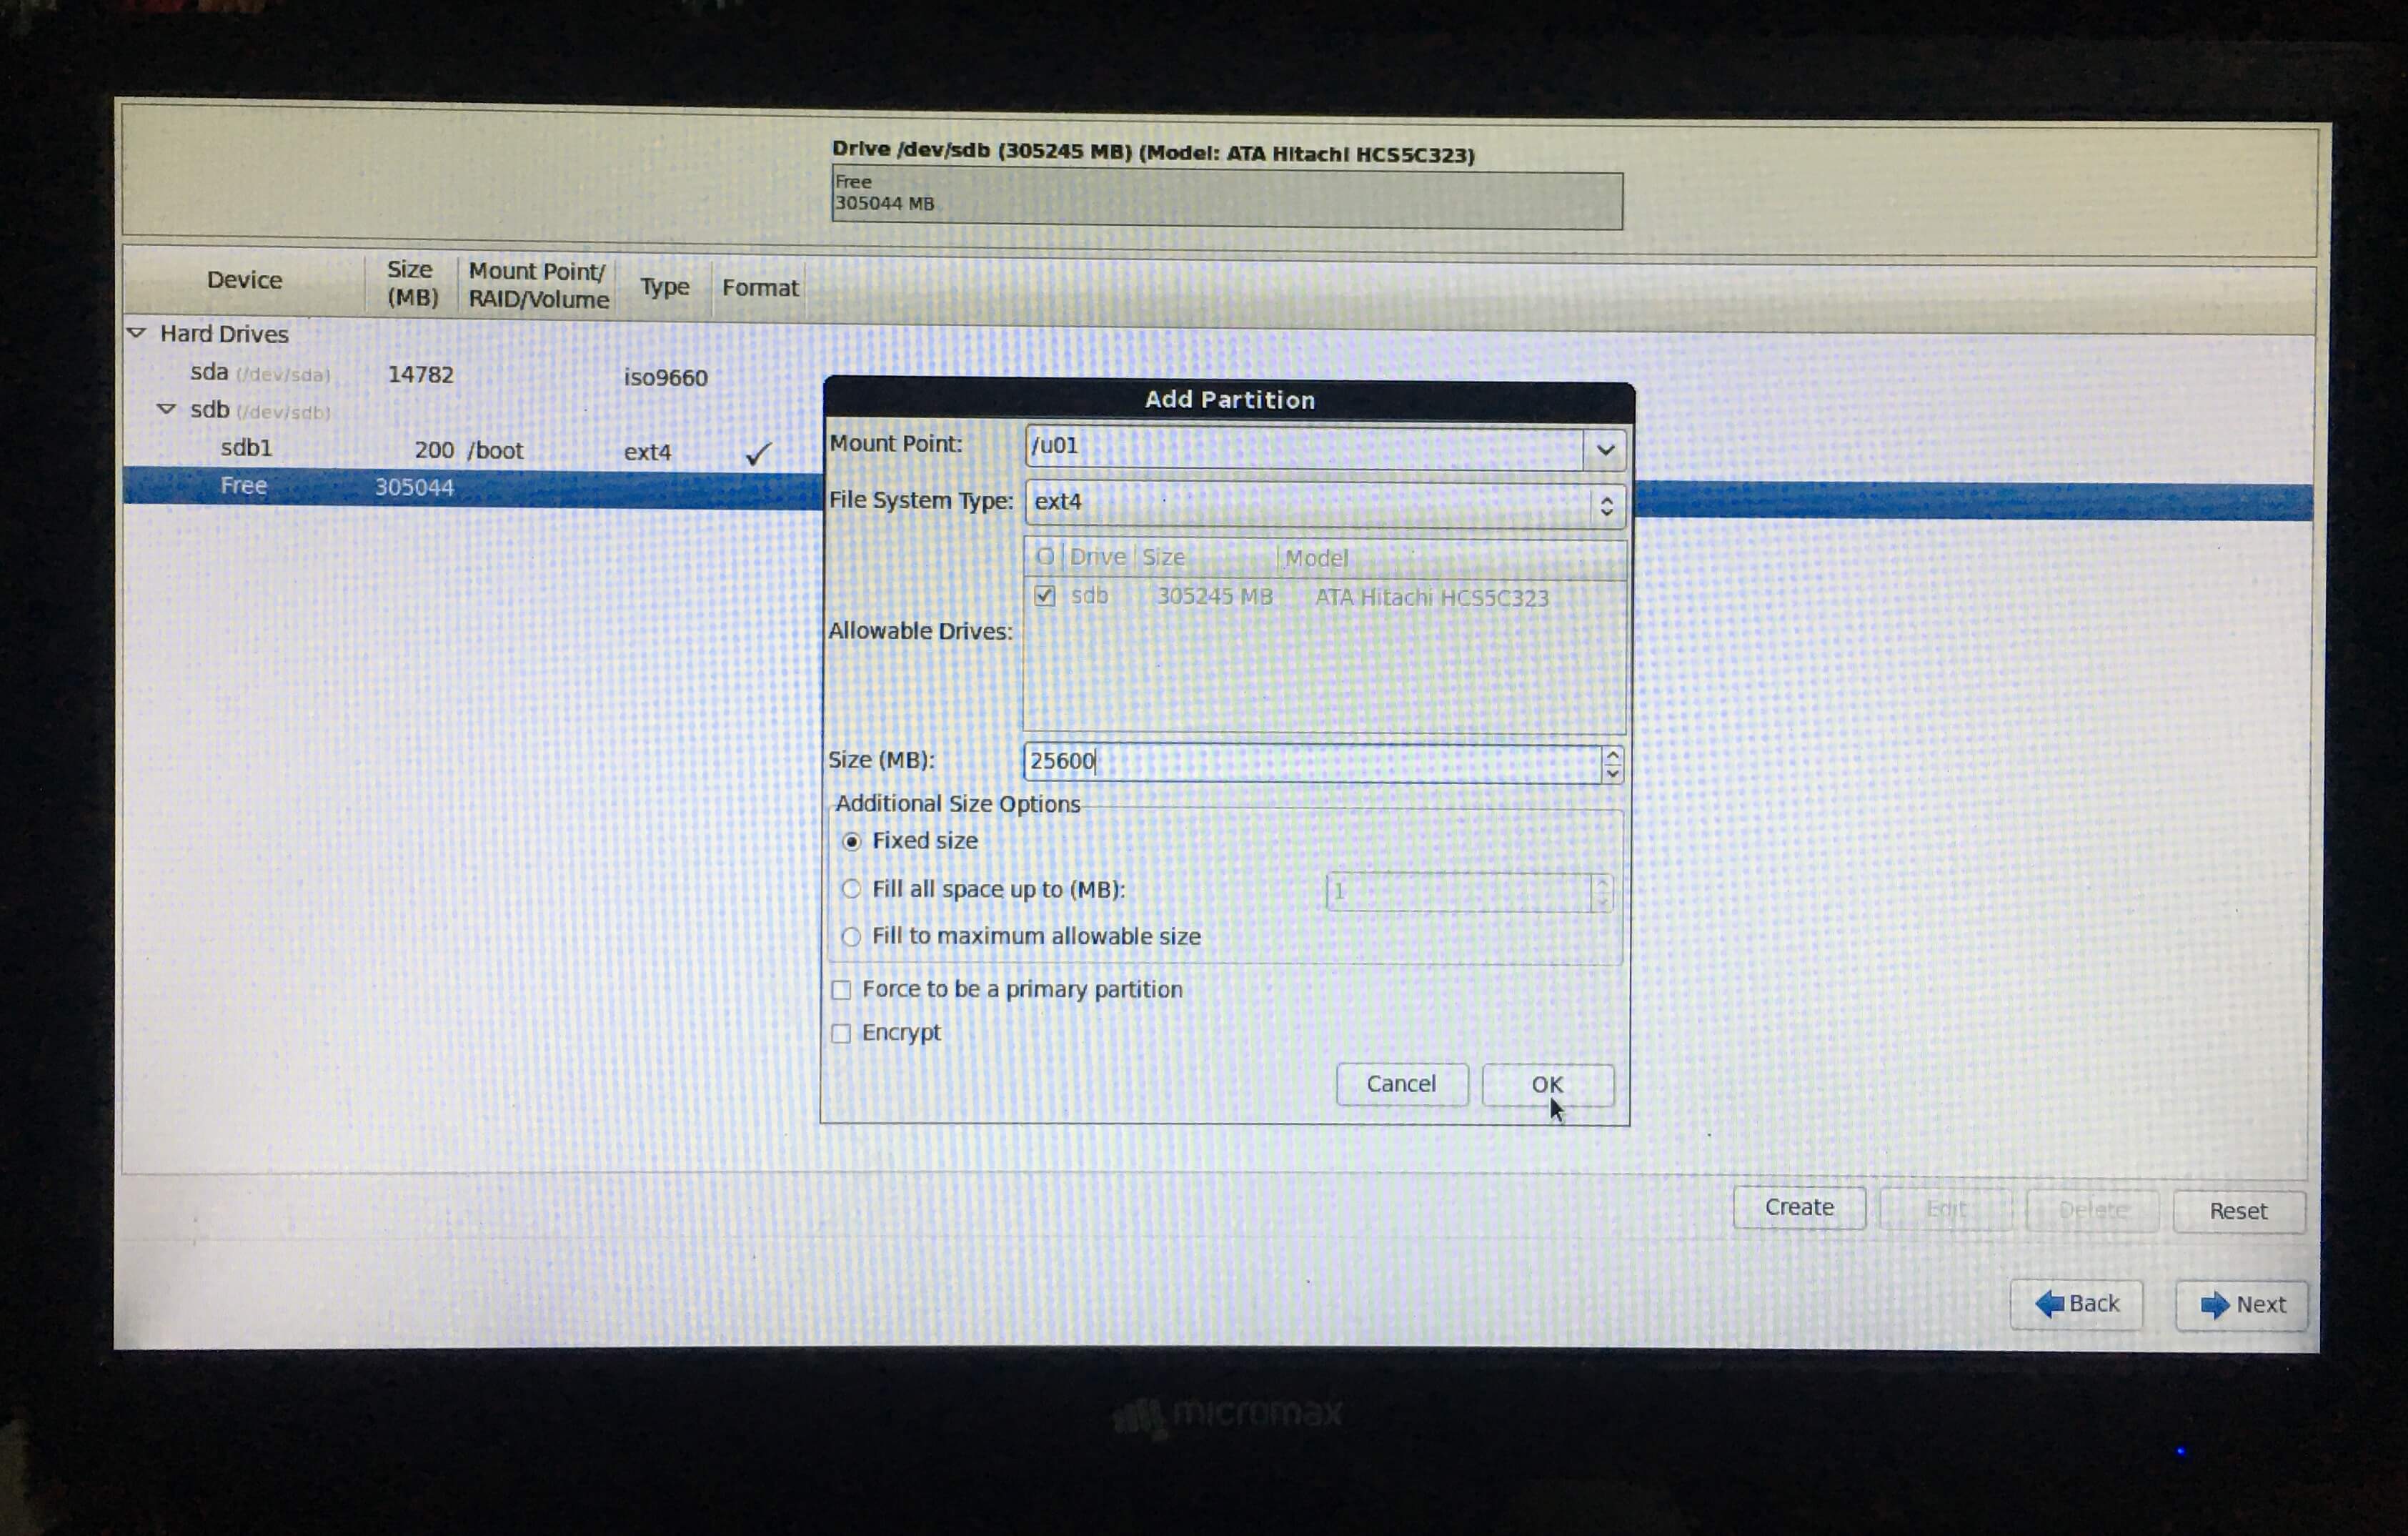
- Select standard partition and click on create, then select mountpoint /u01 from dropdown, enter size 25600 MB (for 25 GB) and click on OK. file system will be default i.e. ext4
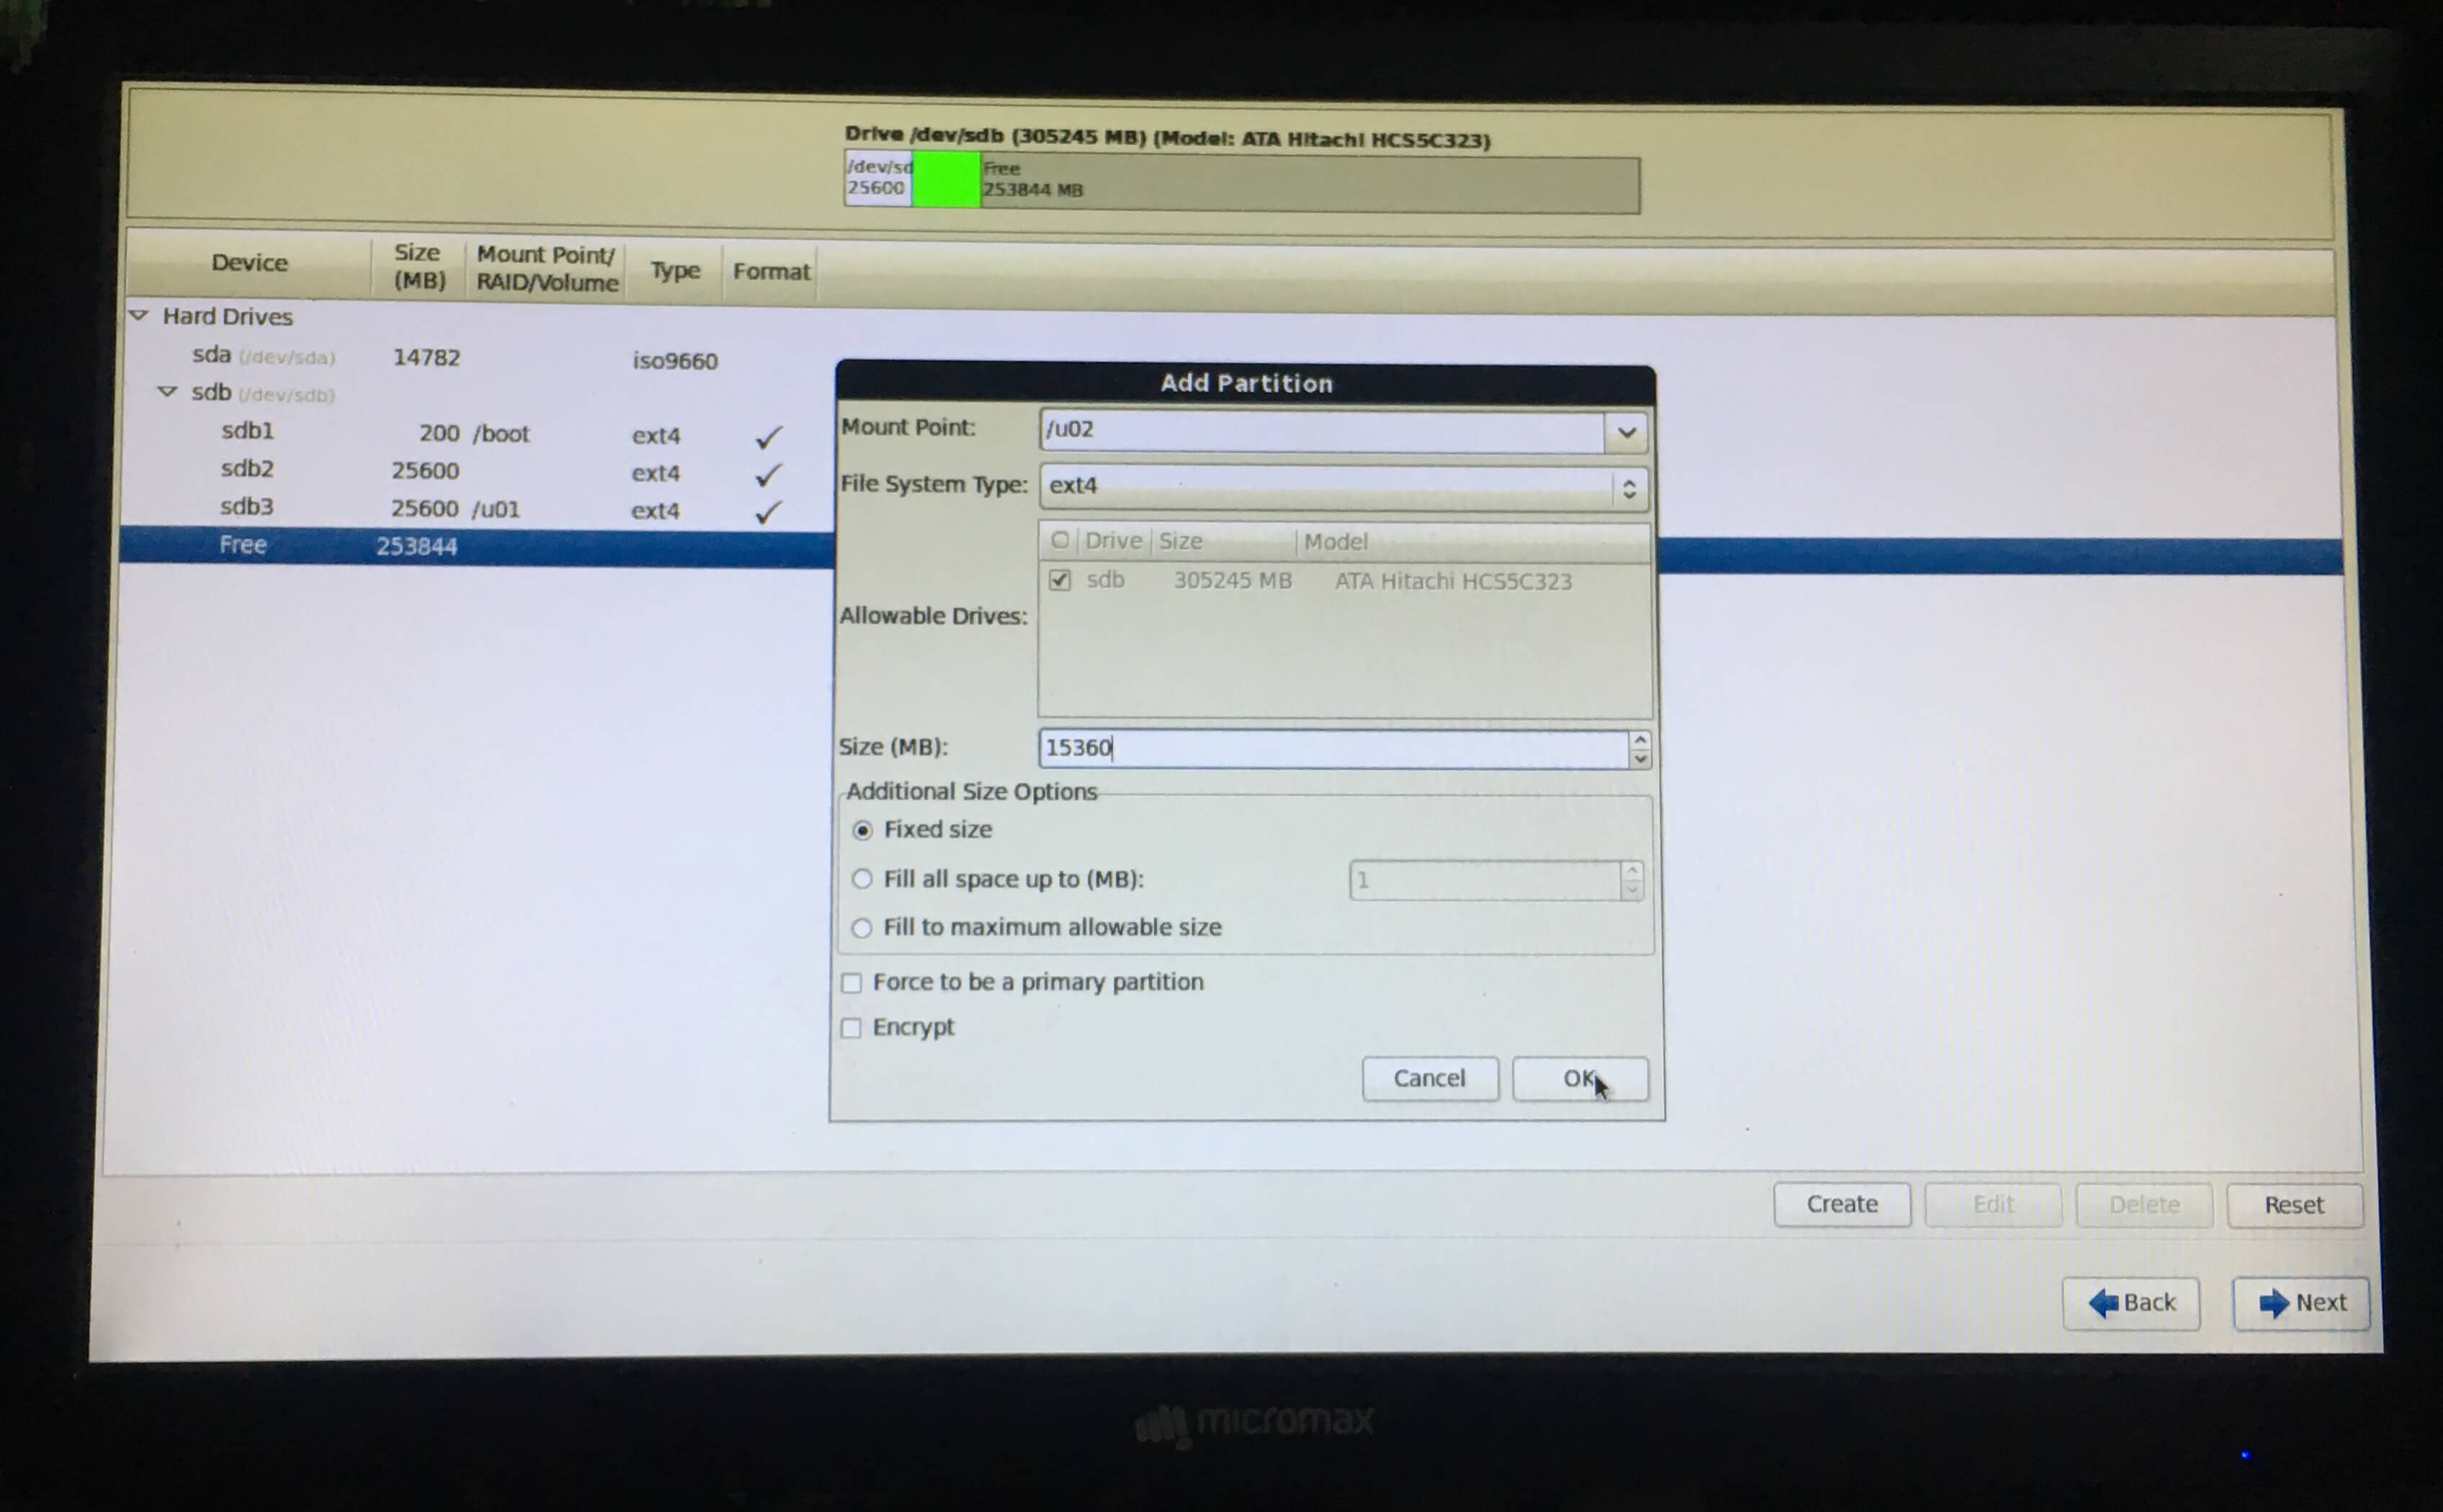
- Select standard partition and click on create, then select mountpoint /u02 from dropdown, enter size 15360 MB (for 15 GB) and click on OK. file system will be default i.e. ext4
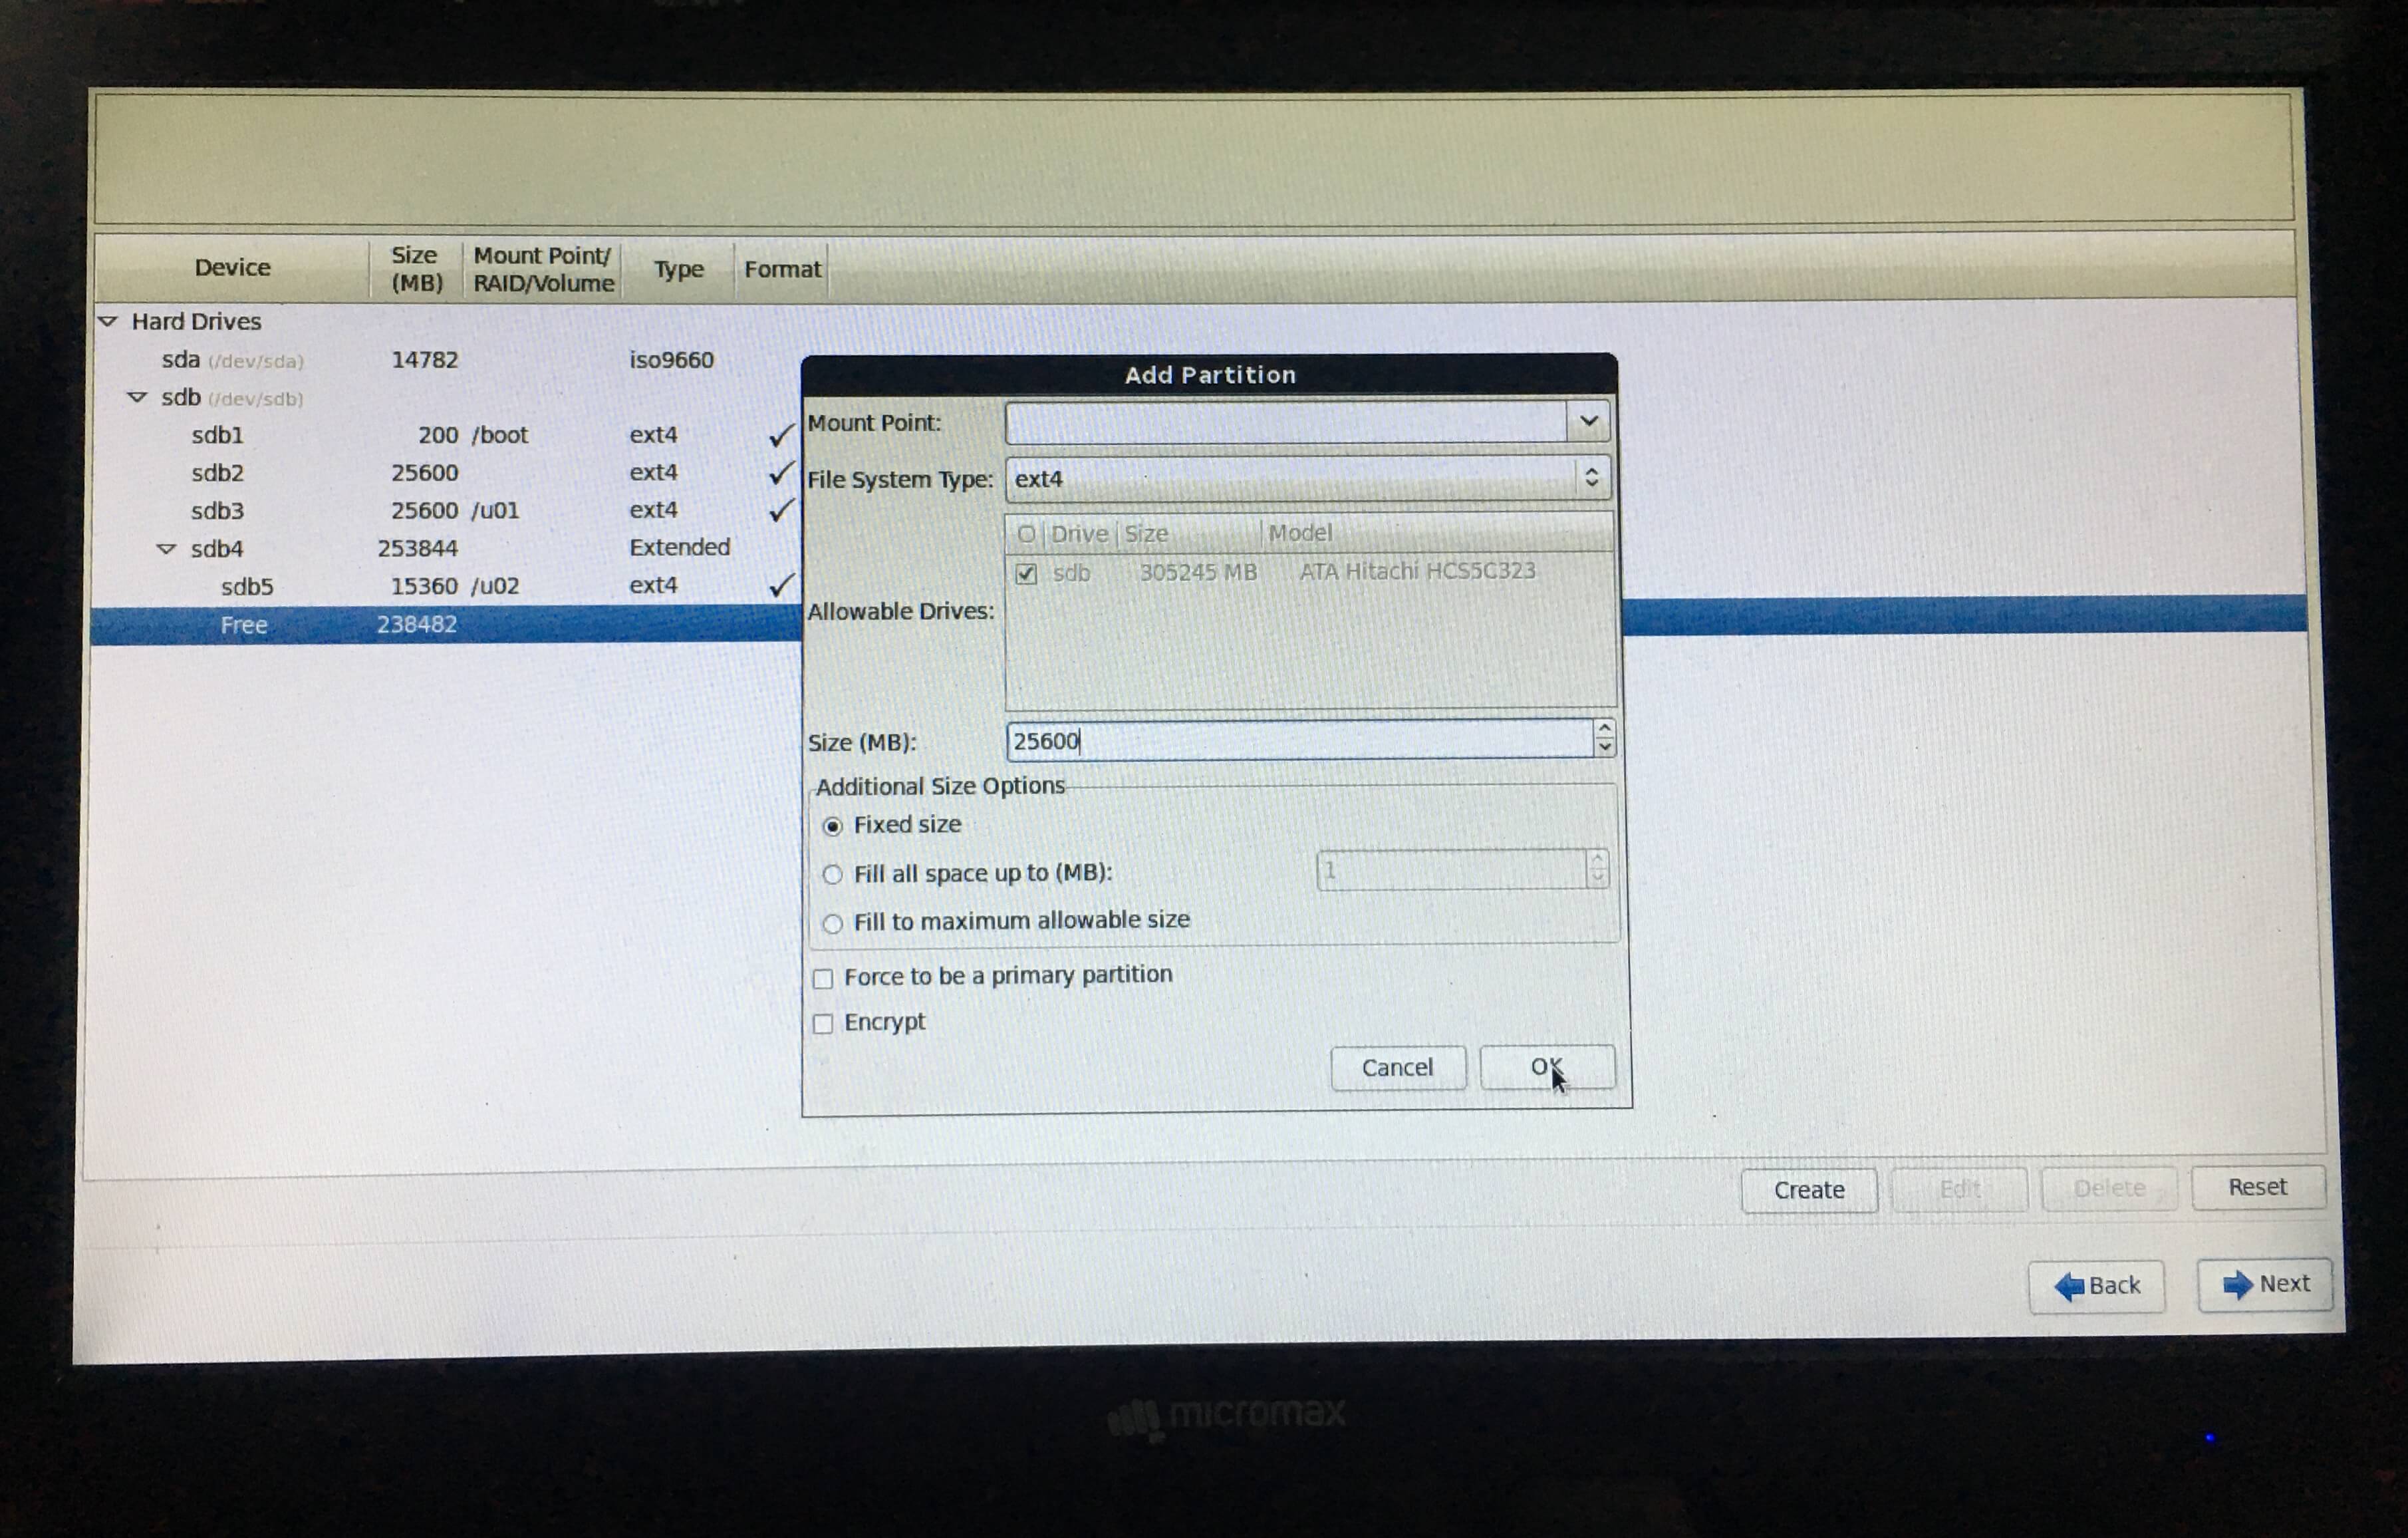
- Select standard partition and click on create, we’ll not select any mountpoint as this will be our raw partition to create ASM disk, enter size 25600 MB (for 25 GB) and click on OK. file system will be default i.e. ext4 (I have created 2 raw disks by doing same step twice).
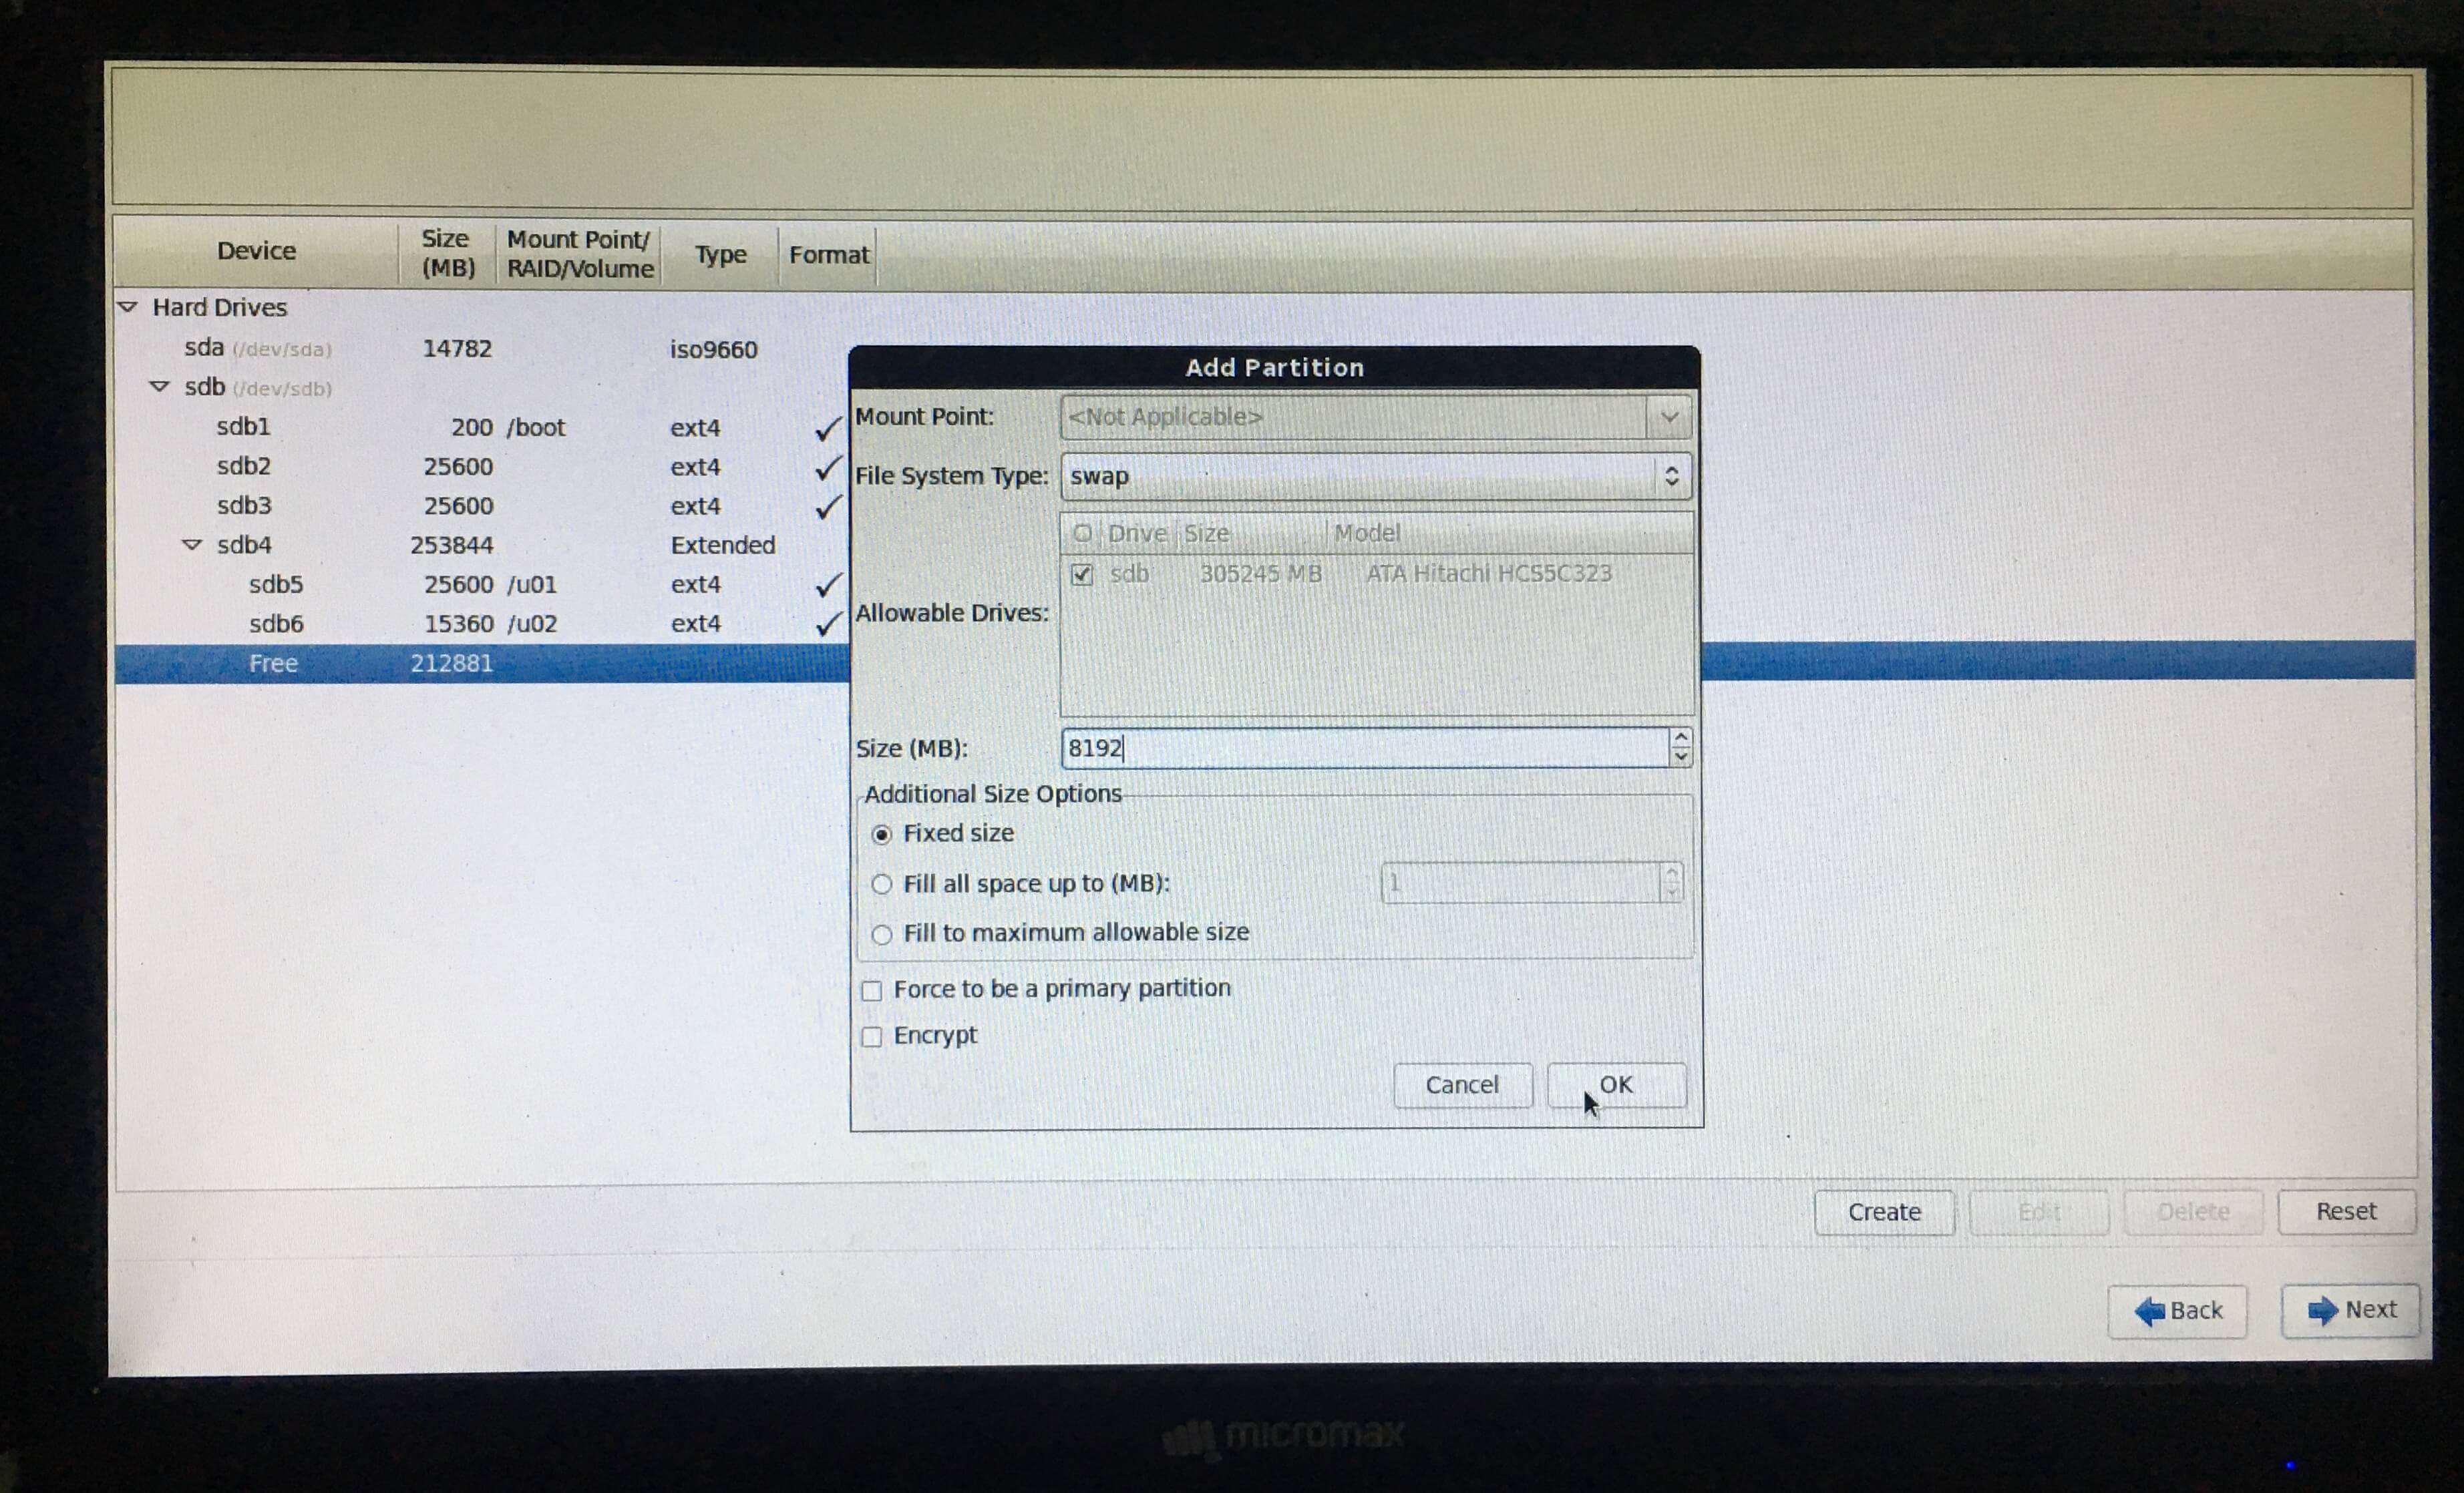
- Select standard partition and click on create, now we’ll select swap in file system type from dropdown to create swap partition, enter size 8192 in MB (for 8 GB) and click on OK.
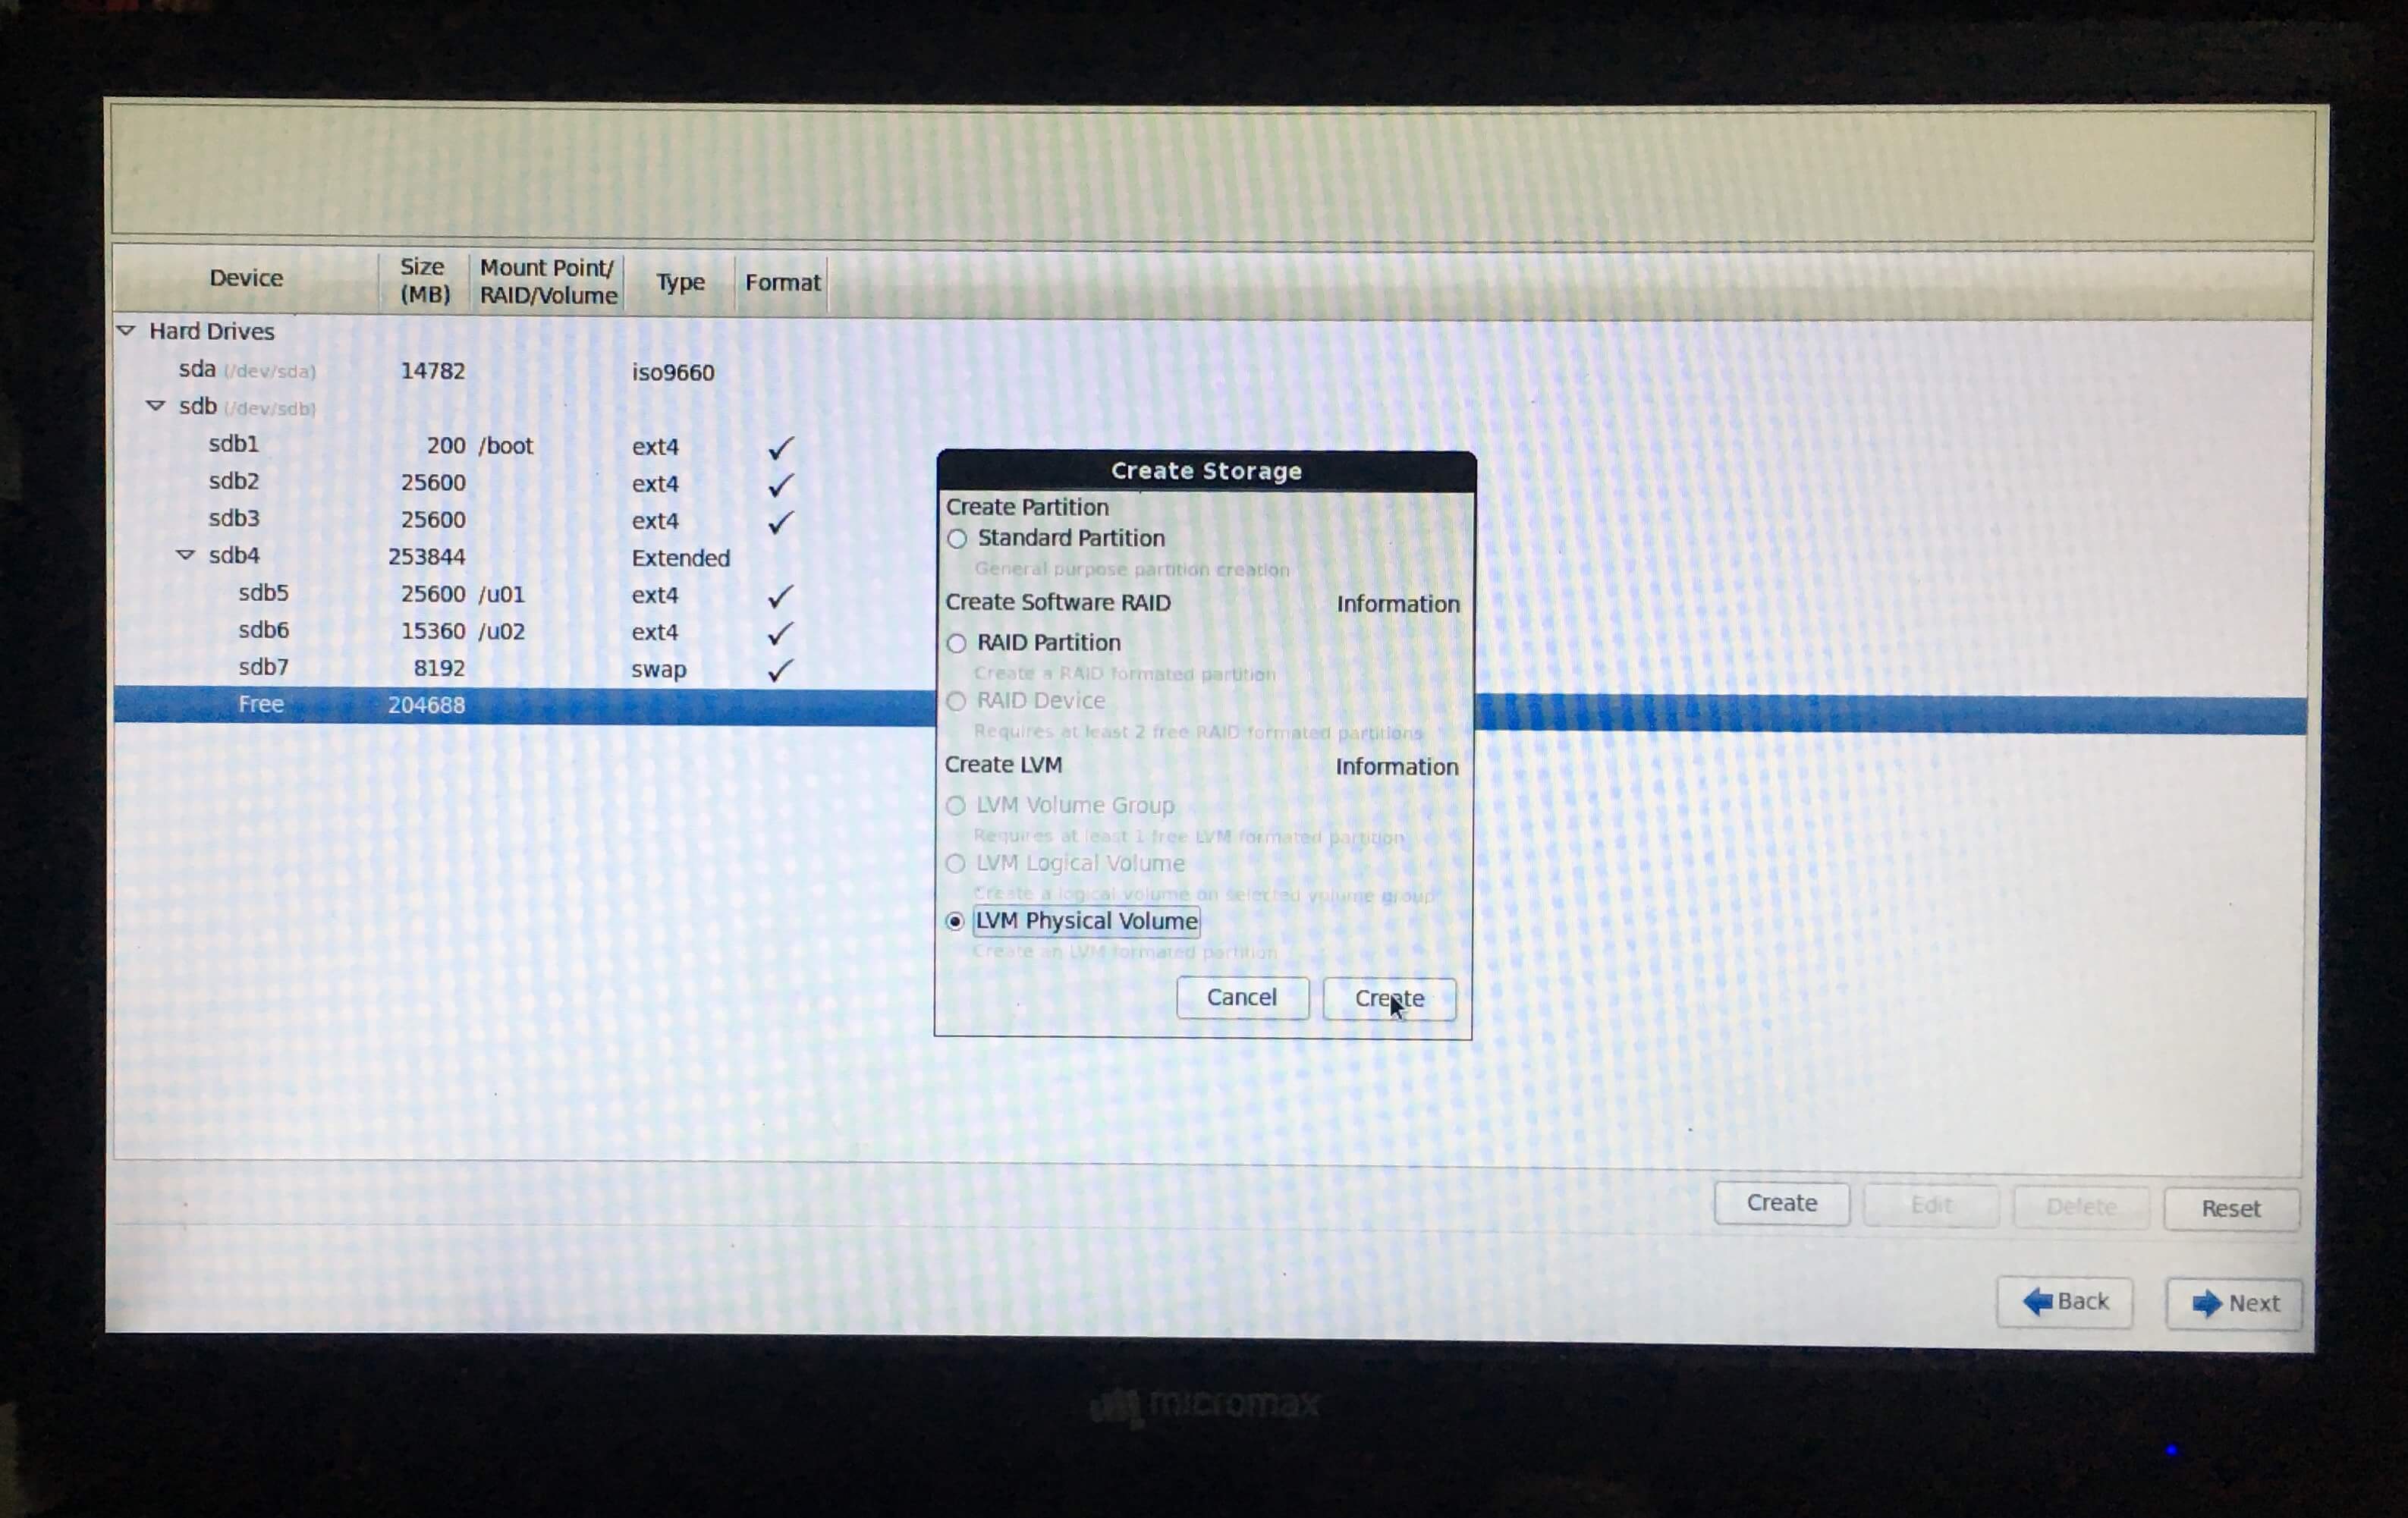
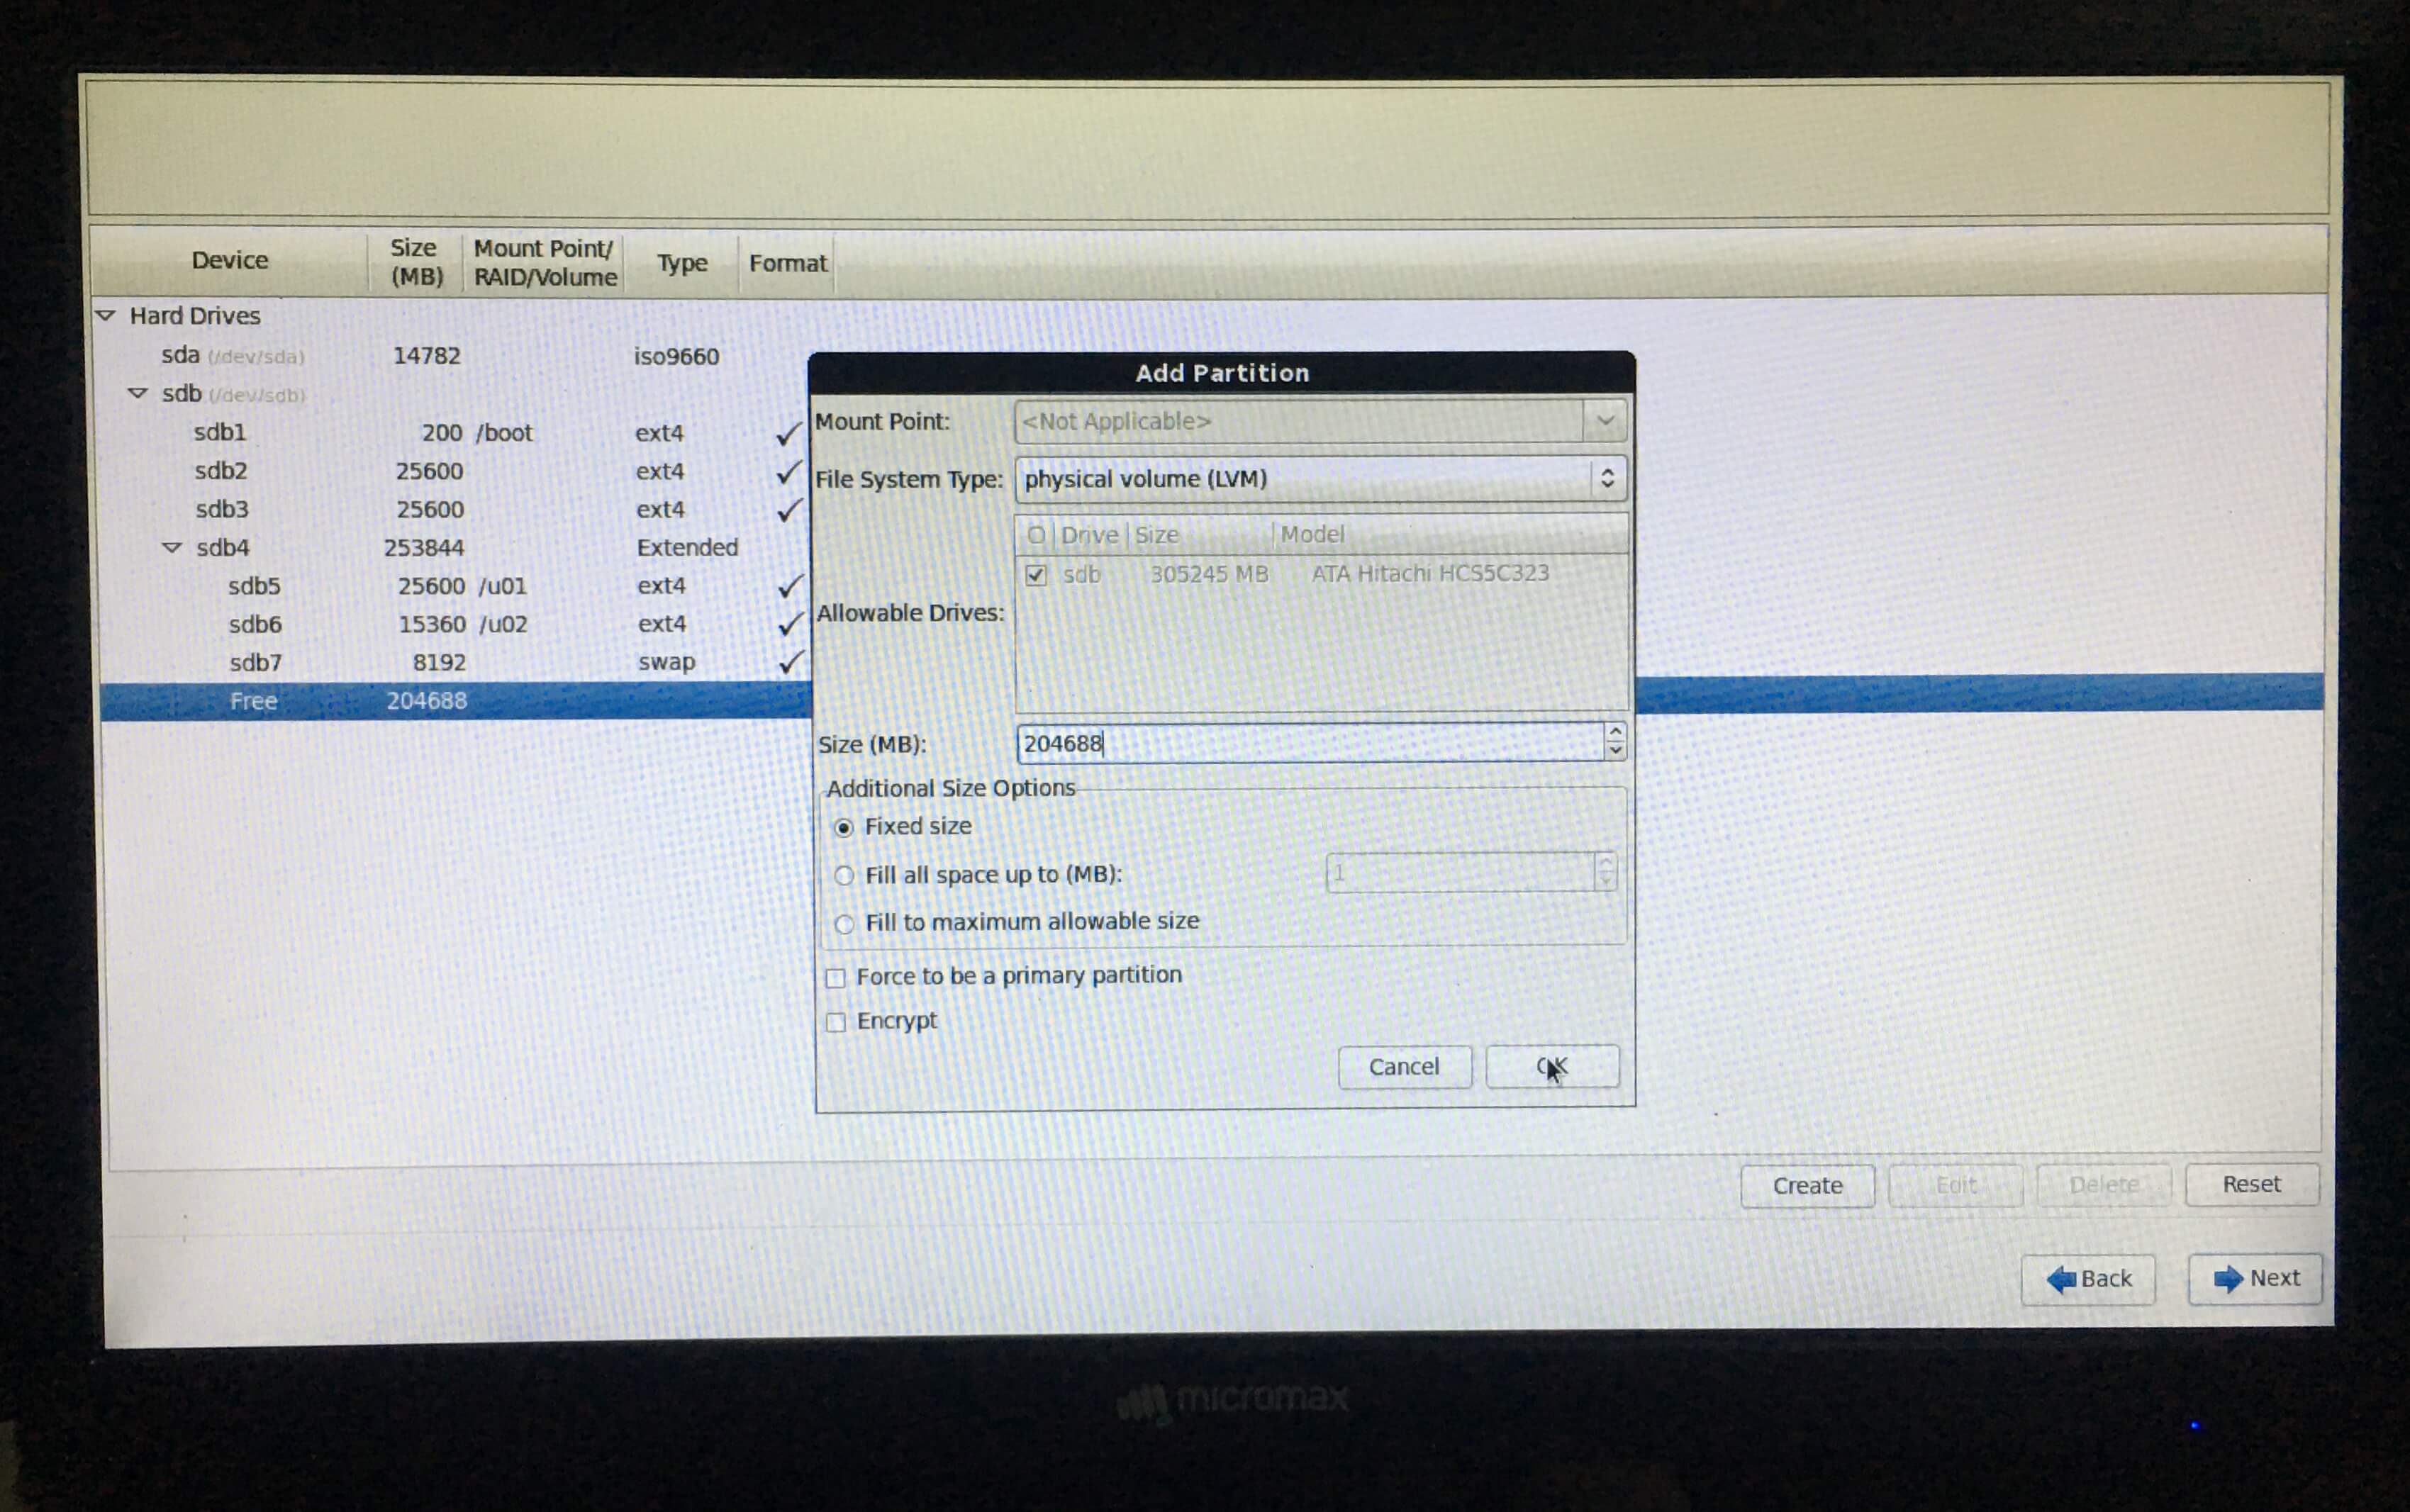
- This time click on LVM Physical Volume and click on create, from file system drop down select physical volume, enter size in MB (enter all available free size) and click on OK.
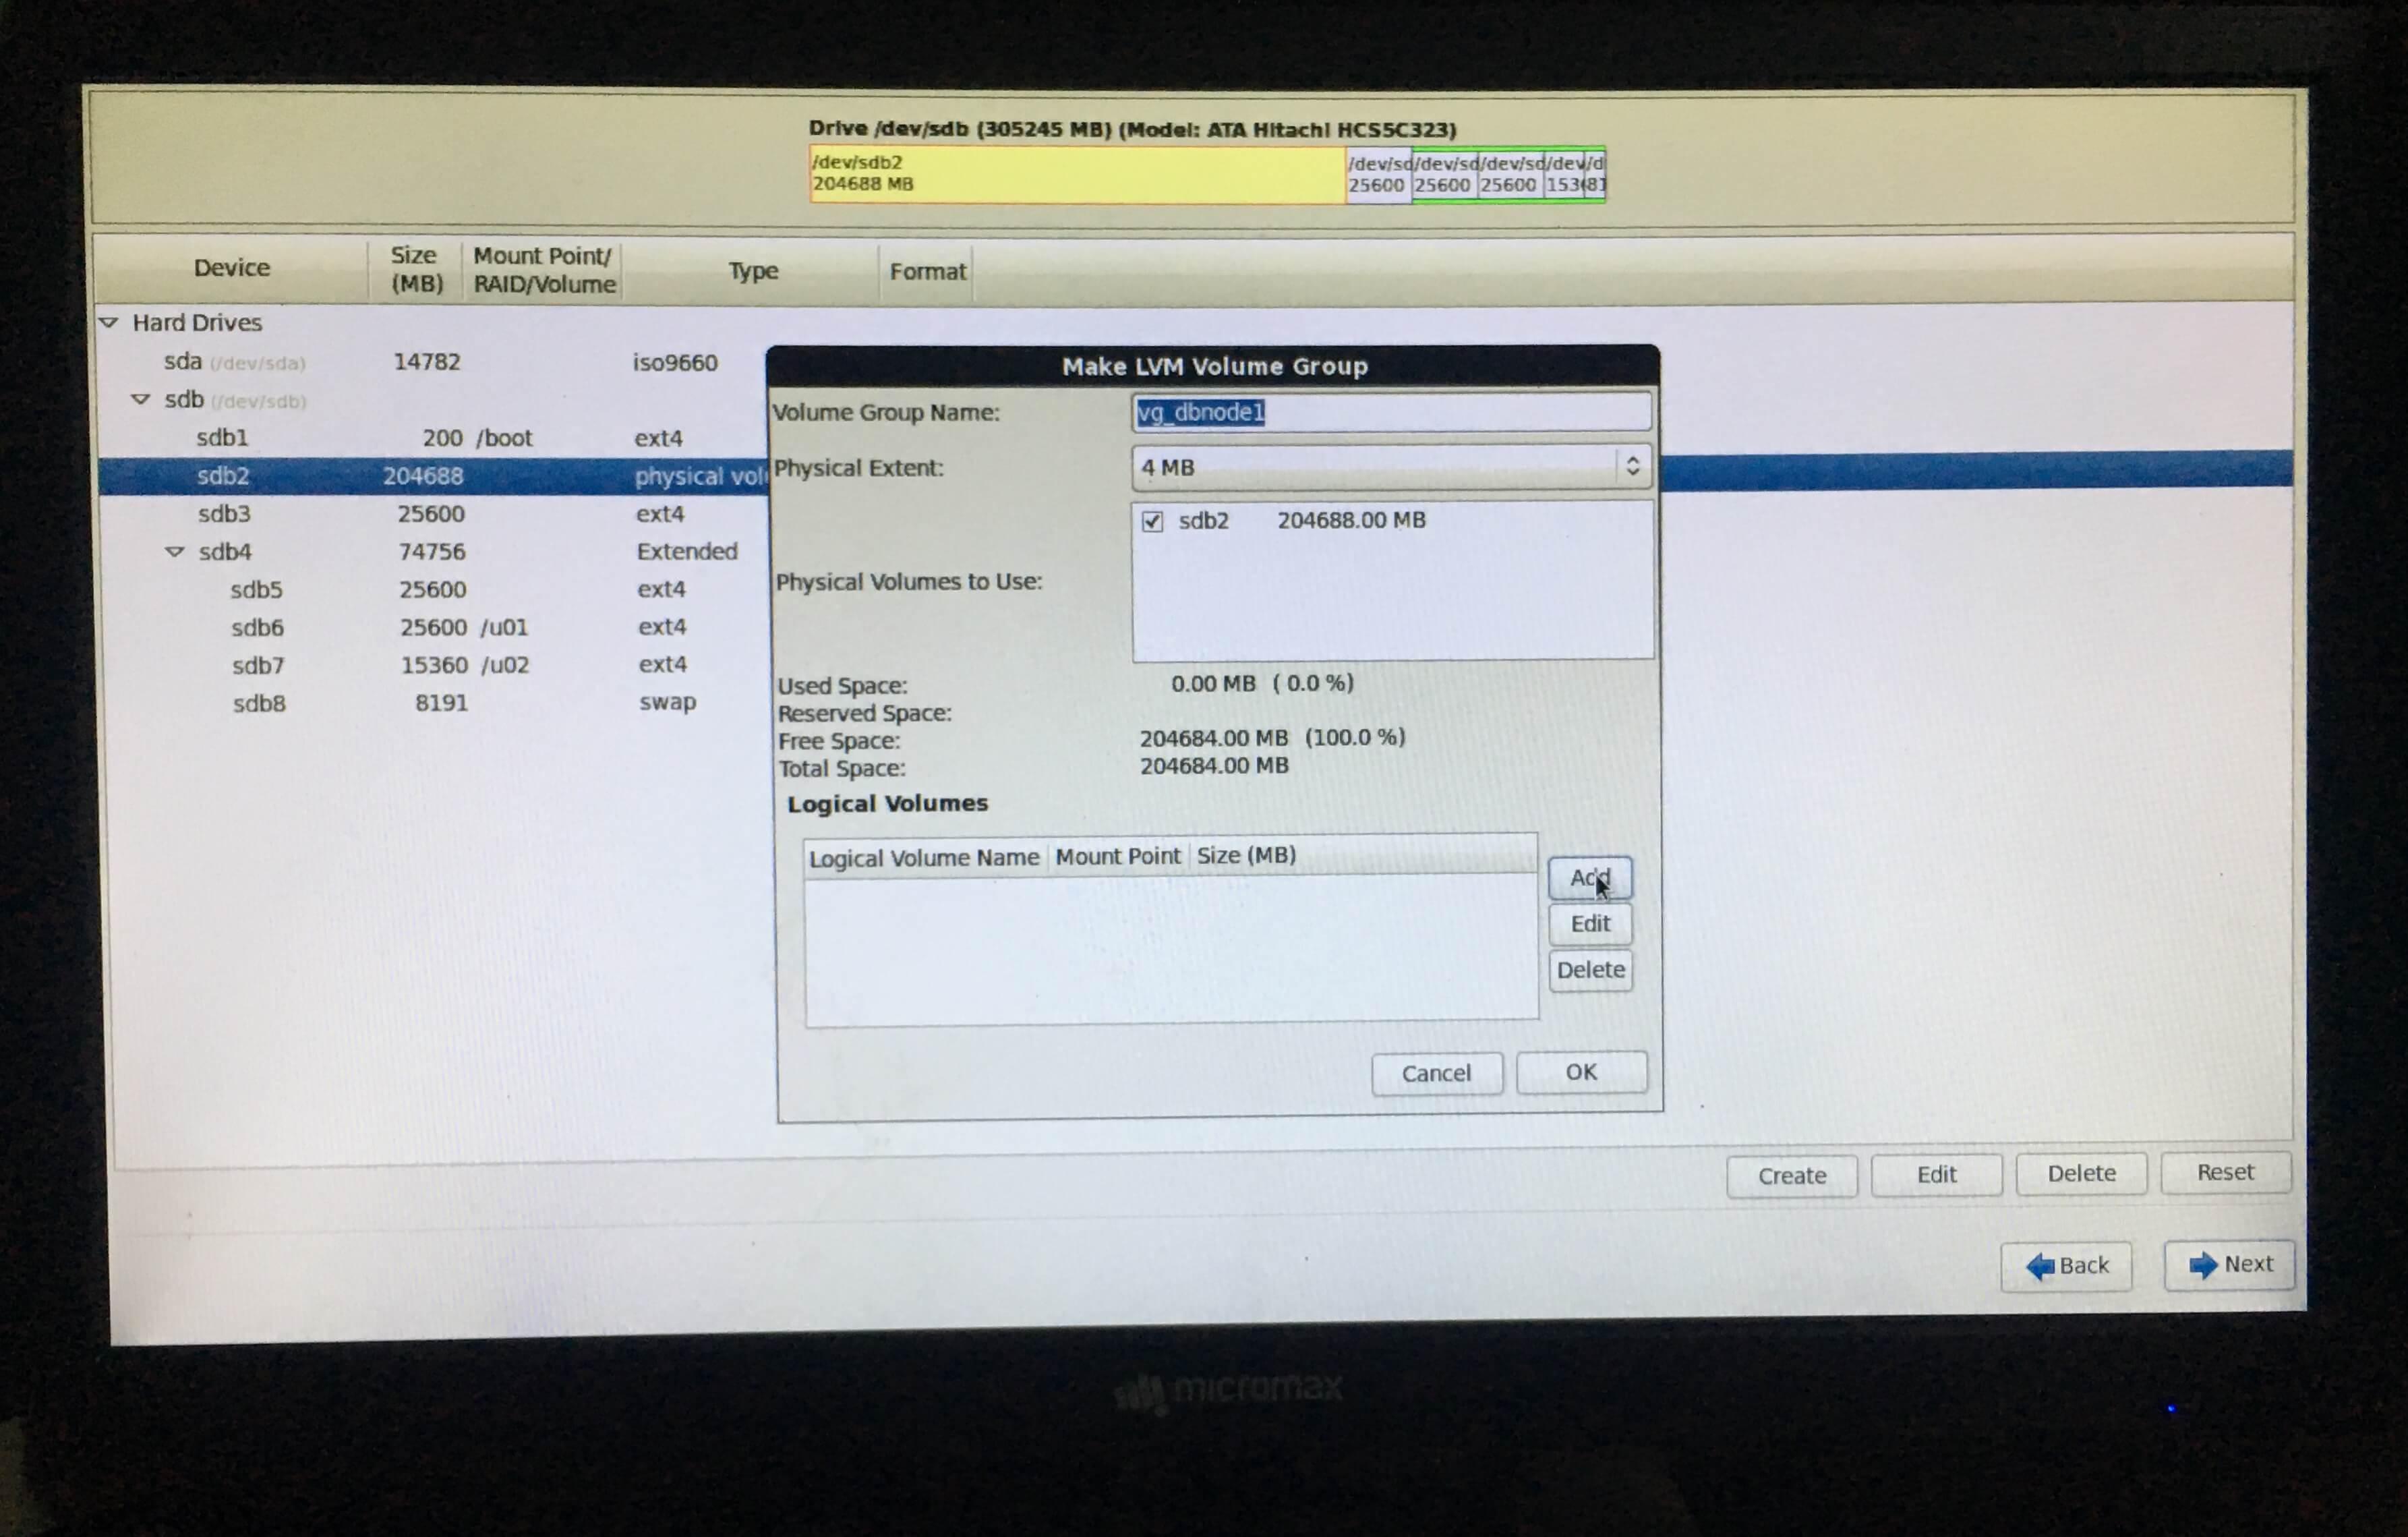
- Now, Highlight LVM Physical Volume which we’ve created, select LVM Volume Group and click on create,


- Give volume group a name, and then click on Add button as shown in the screen shot.
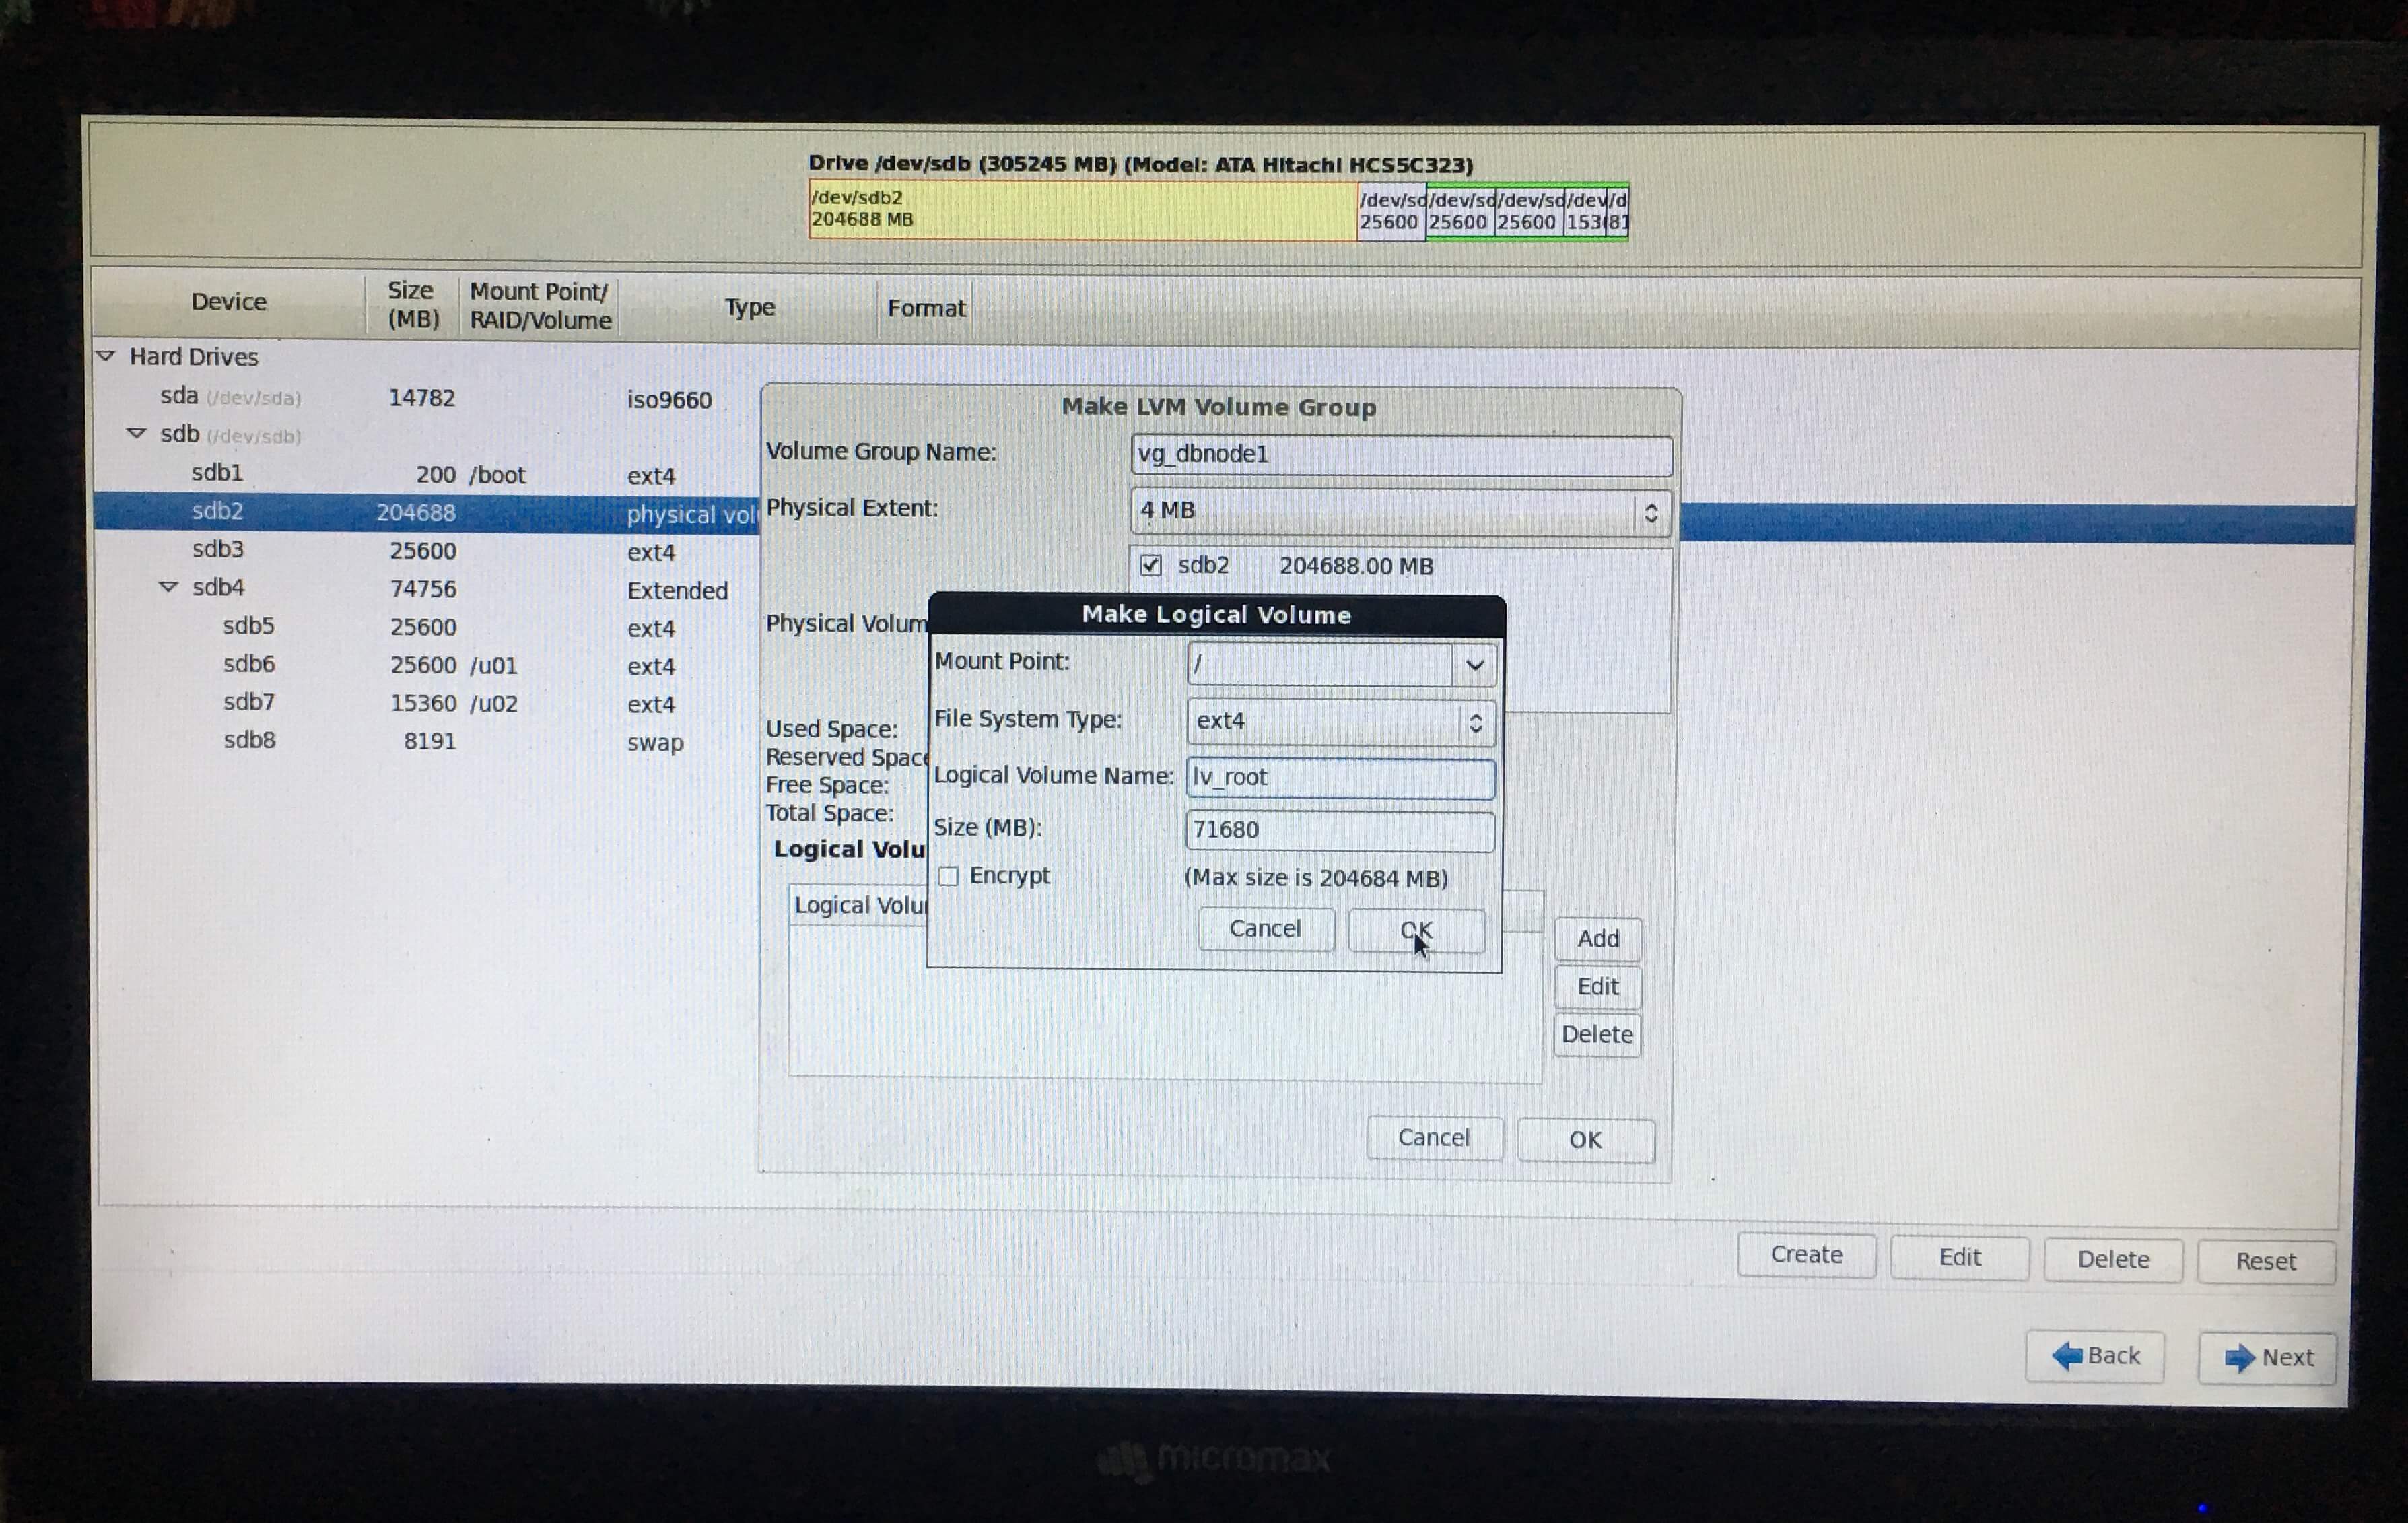
- In pop-up window select mountpoint as “/”, which means root partition for OS.
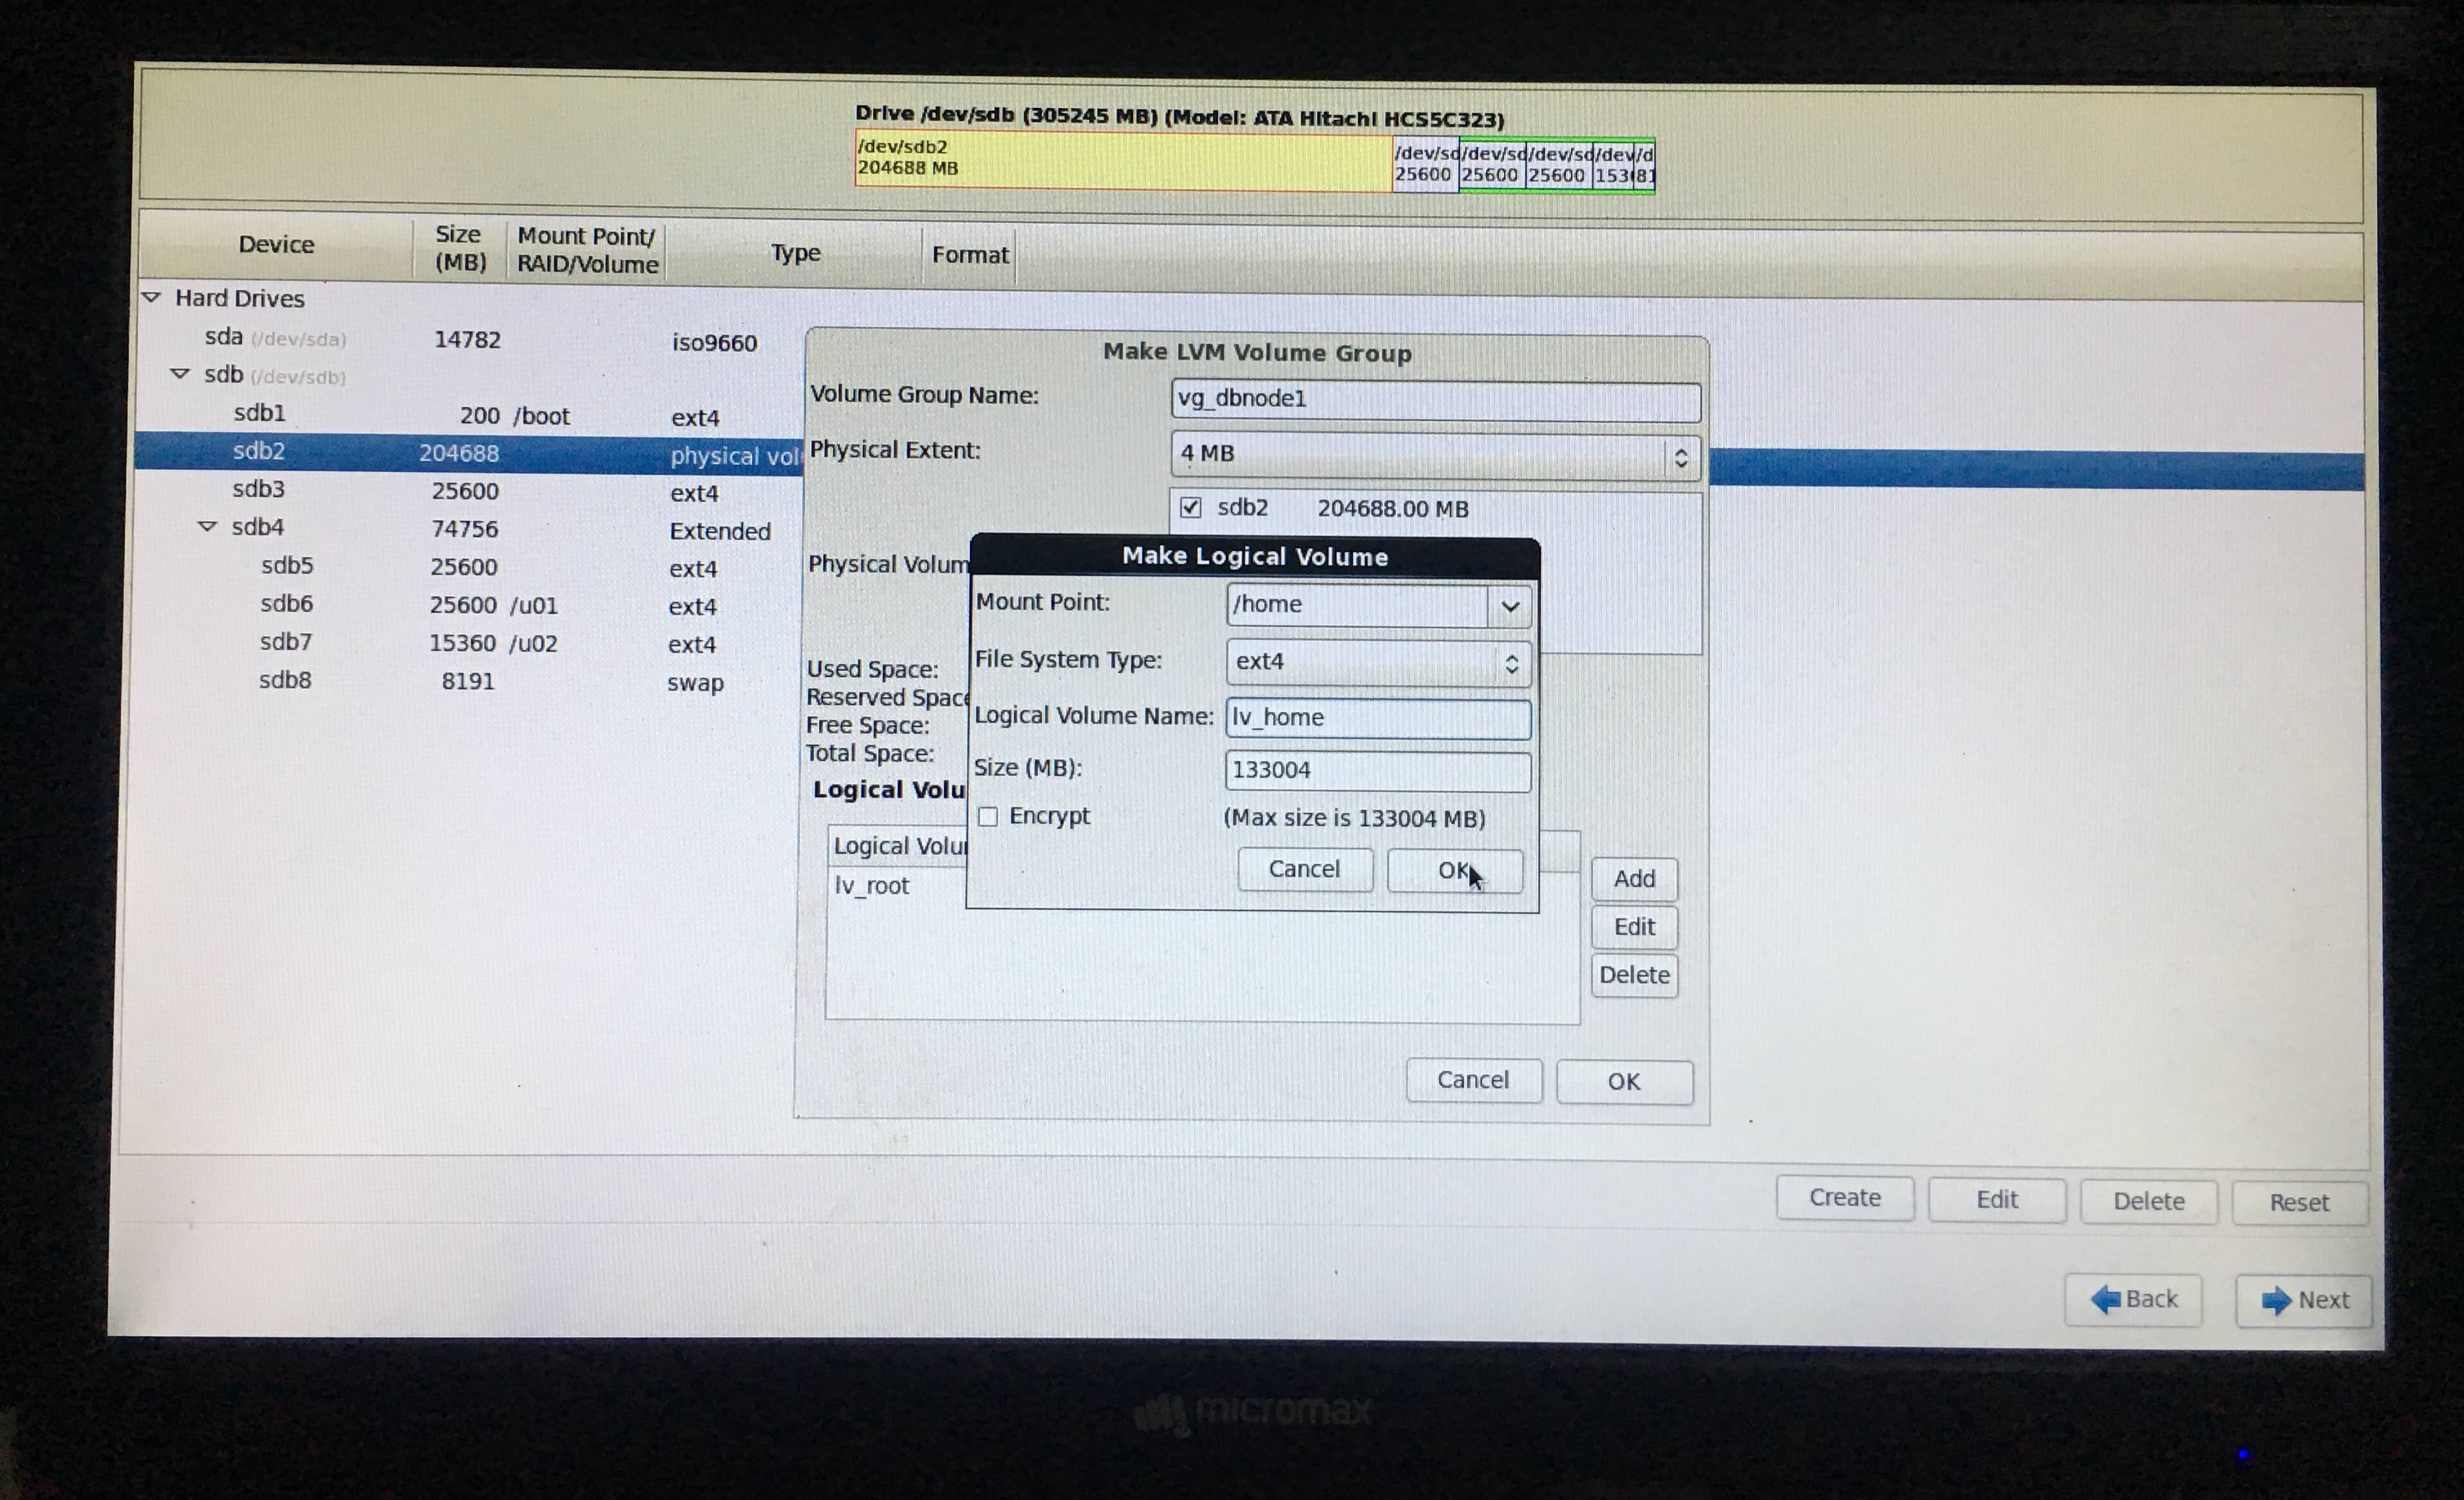
- Again click on Add button as shown in the screen shot. In pop-up window select mountpoint as “/home”, which means home partition of every users.
- Once done with creation of every partitions, click NEXT.


15. Click on write changes to write partitions on device.

16. Verify boot loader operating system list, do not change anything and click NEXT.

17. Select Database Server, from bottom left radio button select Customize now and click NEXT.

18. Select packages from every categories as shown in all screenshots, select language too once done with selections, click NEXT


19. It’ll go a through dependency check and start the installation.

20. Installing packages in progress, this may take 20 to 45 minutes. depending upon your machine.


21. Once it’s done installing all the packages, click on Reboot.

22. Here the installation is completed now. To proceed with post installation process click on Forward.

23. Accept EULA and click Forward.

24. In software updates setup page select No, I prefer to register at later time and click Forward.

Click on No Thanks, I’ll connect later on a Pop-up window.

25. on Finish Update screen, click on Forward.

26. Create oracle user, enter Username, Full Name, Password , Confirm Password and then click on forward.

27. Select date and time Synchronize date and time over the network and click NEXT.

28. Kdump is used to dump the crash information in case of crash of the system. I’ll not prefer to keep Kdump so I’m ignoring it, uncheck the box and click on finish. When you set it, it’ll comsume the memory from RAM.

Click Yes on pop-up to proceed.

29. Here we go, here comes the user login screen, we’ve successfully installed Oracle Enterprise Linux 6.7 on physical server.


How to install Oracle Database 12c, Oracle Grid Infrastructure 12c and setting up ASM.
Peace 🙂
Good work bro ..very detailed and useful doc..